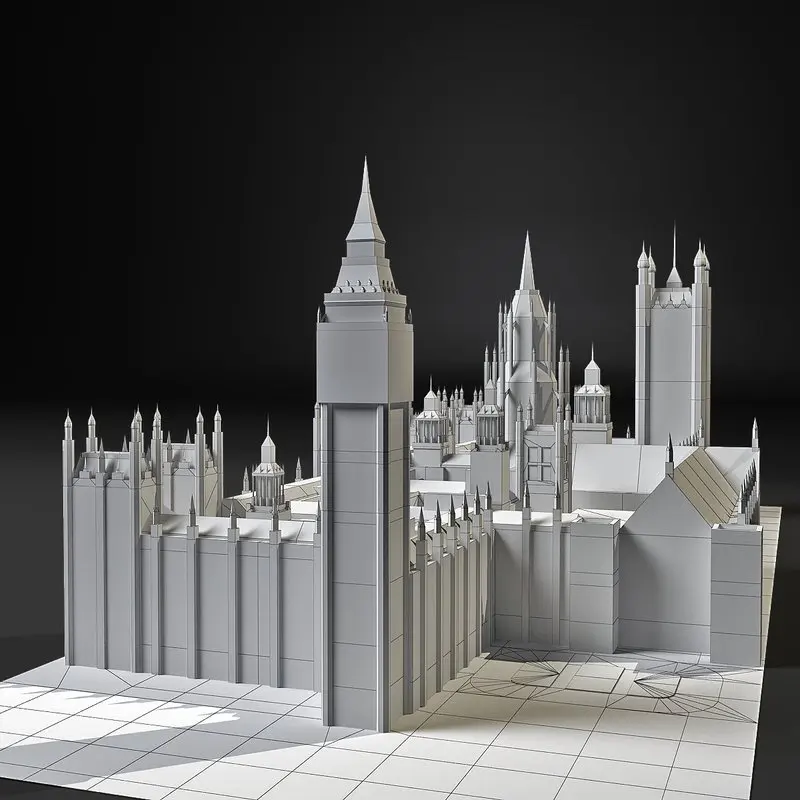
Imagine holding a miniature version of a grand architectural design in your hands, meticulously crafted down to the tiniest detail. This is no longer a distant dream but a reality, thanks to the marvels of modern technology. DLP (Digital Light Processing) printing has revolutionized the way architects and designers bring their concepts to life, creating precise, detailed models that were once painstakingly crafted by hand.

But what exactly is DLP printing, and why is it making waves in the world of architecture? In this blog post, we’ll delve into the fascinating realm of DLP printing, exploring how it works, its advantages, and why it’s becoming an indispensable tool for creating architectural models. We’ll also guide you through the entire process—from designing and preparing your model to printing and post-processing—ensuring you have all the knowledge you need to start bringing your designs to life with DLP printing.
Whether you’re an architect looking to impress clients with detailed scale models, a student eager to learn about the latest in 3D printing technology, or simply curious about how this incredible technology works, this comprehensive guide has got you covered. So, let’s embark on this journey and discover how DLP printing is transforming the world of architectural modeling.
Understanding DLP Printing

In the world of 3D printing, where innovation meets creativity, DLP (Digital Light Processing) printing stands out as a powerful tool for creating detailed and precise models. But what sets DLP apart, and how does it work? Let’s dive deep into this fascinating technology.
What is DLP Printing?

At its core, DLP printing is a type of 3D printing technology that uses a digital light projector to cure photopolymer resin layer by layer. This process allows for high-resolution prints with intricate details, making it ideal for applications like architectural modeling.
How DLP Printing Works
- Light Projection: A digital light projector displays a series of images, one for each layer of the object being printed. Each image corresponds to a cross-section of the model.
- Resin Curing: The light cures the liquid resin in a vat, solidifying it layer by layer. This method is quick and precise.
- Layer Formation: As each layer is cured, the build platform moves slightly, allowing the next layer to be formed.
| Component | Function |
|---|---|
| Projector | Displays images of each layer |
| Resin | Photopolymer that hardens when exposed to light |
| Build Platform | Supports the object as it is being printed |
Advantages of DLP Printing
DLP printing offers several benefits that make it a preferred choice for architectural models:
- High Precision: The ability to produce fine details and smooth surfaces.
- Speed: Faster than many other 3D printing technologies due to simultaneous layer curing.
- Material Versatility: Compatible with various resins, allowing for different finishes and properties.
Why Choose DLP for Architectural Models?

Architects need models that accurately represent their designs, and DLP printing delivers just that.
- Realism: Capture intricate details like textures and patterns.
- Efficiency: Quick production of models, saving time in the design process.
- Flexibility: Easily make adjustments and reprint updated models.
DLP printing is a game-changer for creating architectural models, offering precision, speed, and versatility. By understanding its workings and advantages, you can leverage this technology to bring your architectural designs to life with stunning detail.
Preparing for DLP Printing
So, you’re excited to dive into the world of DLP printing and bring your architectural designs to life. But before you hit that print button, there are a few crucial steps you need to take to ensure a successful and efficient printing process. Preparing for DLP printing involves designing your model with care and preparing the files correctly. Let’s break it down step by step.
Designing Models for DLP Printing
Choosing the Right Software
The first step in preparing for DLP printing is designing your model using the right software. Here are some popular options:
- AutoCAD: Widely used in architecture, it offers robust tools for detailed design.
- SketchUp: Known for its user-friendly interface, it’s great for quick and intuitive modeling.
- Rhino: Excellent for complex and intricate designs, especially when precision is key.
Design Considerations
When designing your model, keep the following considerations in mind to ensure it’s optimized for DLP printing:
- Scale and Detail: DLP printing can produce highly detailed models, but it’s essential to balance detail with scale. Too much detail in a small model can lead to print failures.
- Support Structures: Complex designs often need support structures to print correctly. Plan for these in your design to avoid issues during printing.
- Wall Thickness: Ensure that walls are thick enough to print successfully but not so thick that you waste materials.
| Software | Best For | Key Features |
|---|---|---|
| AutoCAD | Detailed architectural designs | Precision drawing tools |
| SketchUp | Quick and intuitive modeling | Easy-to-use interface |
| Rhino | Complex and intricate designs | Advanced modeling capabilities |
File Preparation
Once your design is ready, the next step is preparing the file for printing.
Exporting Files
Most DLP printers require files in specific formats, usually STL or OBJ. Here’s how to export your file:
- Check your design: Ensure there are no errors or gaps in your model.
- Export as STL or OBJ: Most design software has an export option. Choose the appropriate format for your printer.
Slicing Software and Settings
Slicing software converts your 3D model into layers that the printer can understand. Here’s what you need to do:
- Import your model: Load your STL or OBJ file into the slicing software.
- Configure settings: Adjust settings such as layer height, print speed, and support structures. Each printer and material may require different settings.
Pro Tip: Start with the manufacturer’s recommended settings and tweak as needed based on your specific requirements.
Best Practices for Preparing Models
Optimize for Detail
- Layer Height: Smaller layer heights produce finer details but take longer to print. Find a balance that works for your project.
- Resolution: Higher resolution settings will give you better detail but may increase print time.
Ensure Stability
- Support Structures: Use the slicing software to add support structures where needed. These can be removed post-printing.
- Orientation: Orient your model in a way that minimizes the need for supports and maximizes stability.
Test Prints
Before committing to a full-scale print, consider doing a test print of a smaller section of your model. This can help you identify any potential issues without wasting time and materials on a full print.
Preparing for DLP printing is a crucial step that can make or break the success of your project. By carefully designing your model, properly preparing your files, and optimizing your settings, you can ensure a smooth and efficient printing process. Whether you’re a seasoned architect or a beginner in 3D printing, following these steps will help you bring your architectural designs to life with precision and ease.
Materials for DLP Printing
Choosing the right materials is crucial when it comes to DLP printing, especially for architectural models. The type of resin you select can significantly impact the quality, appearance, and functionality of your final model. Let’s explore the different types of resins available, how to choose the right one for your project, and the factors to consider.
Types of Resins

DLP printing utilizes photopolymer resins that harden when exposed to light. Here are some common types used in architectural modeling:
1. Standard Resins
- Overview: These are the most commonly used resins, offering a balance of detail and strength.
- Best For: General-purpose models and prototypes.
- Characteristics: Smooth finish, decent durability.
2. High-Detail Resins
- Overview: Formulated to produce models with exceptional detail and precision.
- Best For: Intricate designs with fine features.
- Characteristics: Excellent resolution, slightly more brittle.
3. Specialty Resins
- Transparent Resins: Ideal for models requiring clear elements, like windows.
- Flexible Resins: Useful for parts that need some elasticity.
- High-Temperature Resins: Suitable for models that may undergo heat exposure.
| Resin Type | Best For | Characteristics |
|---|---|---|
| Standard Resins | General-purpose models | Smooth finish, balanced strength |
| High-Detail Resins | Intricate designs | Exceptional detail, more brittle |
| Transparent Resins | Clear elements | Clarity, aesthetic appeal |
| Flexible Resins | Elastic parts | Flexibility, impact resistance |
| High-Temperature Resins | Heat-resistant parts | Thermal stability, durability |
Choosing the Right Resin for Architectural Models
Selecting the appropriate resin depends on several factors:
Detail and Precision
- High-Detail Resins: Opt for these if your model requires intricate details and fine features.
- Standard Resins: Suitable for general models where extreme detail is not necessary.
Strength and Durability
- Standard Resins: Provide a good balance of strength and flexibility.
- Specialty Resins: Choose based on specific needs like flexibility or heat resistance.
Finish and Aesthetics
- Transparent Resins: Perfect for models with glass-like elements.
- Standard and High-Detail Resins: Offer a smooth, professional finish.
Cost Considerations
- Budget: Standard resins are generally more affordable, making them ideal for multiple iterations.
- Project Requirements: Invest in specialty resins only if your project demands unique properties.
Tips for Working with Resins
Handling and Safety
- Protective Gear: Always wear gloves and goggles when handling resins.
- Ventilation: Work in a well-ventilated area to avoid inhaling fumes.
Storage
- Cool, Dark Place: Store resins in a cool, dark place to prevent premature curing.
- Seal Properly: Ensure containers are sealed tightly to maintain resin quality.
Testing and Experimentation
- Test Prints: Conduct small test prints to see how a resin behaves before committing to a full model.
- Experiment: Don’t hesitate to try different resins to find the best match for your project.
Choosing the right resin for DLP printing is a critical step that influences the outcome of your architectural models. By understanding the different types of resins and considering factors like detail, strength, finish, and cost, you can select the perfect material for your needs.
The DLP Printing Process
Now that you’ve designed your model and chosen the right resin, it’s time to dive into the actual DLP printing process. This section will guide you through each step, from setting up your printer to the final post-processing touches. Understanding these steps will help you achieve the best possible results for your architectural models.

Setting Up Your Printer
Calibration
Before you start printing, you need to calibrate your DLP printer. Proper calibration ensures accuracy and prevents print failures.
- Level the Build Platform: Use the printer’s leveling function to ensure the build platform is perfectly flat.
- Check Projector Alignment: Ensure the projector is aligned correctly to avoid distortions in your print.
Preparing the Resin
- Shake or Stir: Mix the resin thoroughly to ensure a consistent viscosity.
- Pour into Vat: Pour the resin into the printer’s vat, making sure not to overfill.
Loading the File
- Transfer the File: Load your sliced file onto the printer, usually via USB or Wi-Fi.
- Select Print Settings: Choose the appropriate settings based on your resin and model.
| Step | Action | Purpose |
|---|---|---|
| Level the Build Platform | Use leveling function | Ensure flat build surface |
| Check Projector Alignment | Align projector | Avoid distortions |
| Shake or Stir Resin | Mix resin thoroughly | Consistent viscosity |
| Pour into Vat | Pour resin carefully | Avoid overfilling |
| Transfer the File | Load sliced file onto printer | Prepare for printing |
| Select Print Settings | Choose settings based on resin and model | Optimize print quality |
Printing the Model
Initiating the Print
- Start the Print: Once everything is set up, start the print job. The printer will begin curing the resin layer by layer.
- Monitor Progress: Keep an eye on the print to catch any issues early. Some printers have built-in cameras for remote monitoring.
Layer-by-Layer Curing
- Light Projection: The projector displays each layer’s image, curing the resin in that specific shape.
- Build Platform Movement: After each layer is cured, the build platform moves slightly to allow the next layer to form.
Common Issues and Troubleshooting
- Layer Shifting: Ensure the build platform is secure and the projector is aligned.
- Incomplete Curing: Check resin quality and projector settings.
Post-Processing
Once your model is printed, it’s not quite ready yet. Post-processing is essential to achieve the final look and feel.
Removing the Model
- Detach from Build Platform: Carefully remove the model from the build platform using a scraper.
- Remove Supports: Use pliers or a knife to remove any support structures.
Cleaning the Model
- Isopropyl Alcohol (IPA): Rinse the model in IPA to remove any uncured resin.
- Ultrasonic Cleaner: For a thorough clean, use an ultrasonic cleaner if available.
Curing the Model
- UV Light: Place the model under a UV light to ensure it’s fully cured.
- Sunlight: If a UV light is not available, natural sunlight can also work, though it may take longer.
| Step | Action | Purpose |
|---|---|---|
| Detach from Build Platform | Use a scraper | Remove model without damage |
| Remove Supports | Use pliers or knife | Clean up model |
| Rinse in IPA | Clean with isopropyl alcohol | Remove uncured resin |
| Use Ultrasonic Cleaner | Optional for thorough cleaning | Ensure no residue remains |
| UV Light Curing | Place under UV light | Fully cure the model |
| Sunlight Curing | Use natural sunlight (if no UV light) | Alternative curing method |
Finishing Touches
Sanding and Smoothing
- Fine Sandpaper: Use fine-grit sandpaper to smooth out any rough edges or layer lines.
- Polishing: For a glossy finish, polish the model using a soft cloth and polishing compound.
Painting and Detailing
- Primer: Apply a primer to prepare the surface for painting.
- Paint: Use acrylic or model paint to add color and details.
- Sealant: Apply a sealant to protect the paint and add a professional finish.
Assembling Components
- Glue: If your model has multiple parts, use model glue to assemble them.
- Fit and Finish: Ensure all parts fit together snugly and securely.
The DLP printing process involves several meticulous steps, from setting up your printer to the final post-processing touches. By following these steps, you can ensure your architectural models are printed with precision and finish beautifully. Whether you’re a seasoned professional or a beginner, understanding the entire process will help you achieve the best possible results.
Post-Processing Techniques for DLP Prints

After completing the DLP printing process, the journey to creating a stunning architectural model doesn’t stop there. Post-processing is a crucial step that ensures your models look their best, with smooth surfaces and intricate details highlighted. This section will cover various post-processing techniques, from basic cleaning to advanced finishing touches.
Cleaning the Printed Model
Removing Excess Resin
Once the print is complete, the first step is to remove any excess resin.
- Isopropyl Alcohol (IPA) Bath: Submerge the model in an IPA bath. This helps dissolve and remove any uncured resin.
- Duration: Soak for about 5-10 minutes.
- Agitation: Gently agitate the model in the bath to ensure thorough cleaning.
- Ultrasonic Cleaner: For a more thorough clean, use an ultrasonic cleaner if available. This device uses ultrasonic waves to clean the model more effectively.
- Duration: Run the cleaner for 3-5 minutes.
Rinsing and Drying
After cleaning, rinse the model with clean water to remove any remaining IPA.
- Rinse: Use a gentle stream of water to rinse the model.
- Drying: Allow the model to air dry completely. You can use a soft cloth to pat it dry but be gentle to avoid damaging any delicate parts.
| Step | Action | Purpose |
|---|---|---|
| IPA Bath | Submerge model in isopropyl alcohol | Remove uncured resin |
| Ultrasonic Cleaner | Use if available for a thorough clean | Ensure no residue remains |
| Rinse | Use clean water to rinse the model | Remove any remaining IPA |
| Drying | Air dry or pat with a soft cloth | Prepare for further processing |
Curing the Model
UV Curing
Curing ensures that the model is fully hardened and durable.
- UV Light Box: Place the model in a UV light curing box.
- Duration: Cure for 10-15 minutes, depending on the resin manufacturer’s recommendations.
- Natural Sunlight: If a UV light box is not available, place the model in direct sunlight.
- Duration: Allow 1-2 hours for full curing.
Ensuring Complete Curing
Check the model for any tacky spots. If found, additional curing time may be needed.
| Method | Action | Purpose |
|---|---|---|
| UV Light Box | Place in UV light box | Fully cure the model |
| Natural Sunlight | Place in direct sunlight | Alternative curing method |
| Check for Tacky Spots | Inspect model post-curing | Ensure complete hardening |
Removing Supports and Sanding

Removing Supports
Support structures are essential during printing but must be removed carefully.
- Pliers or Clippers: Use precision pliers or clippers to remove supports.
- Method: Gently clip supports close to the model to avoid damaging it.
- Knife: For smaller or more delicate supports, use a hobby knife.
- Safety: Always cut away from your body and fingers.
Sanding
Sanding smooths out any rough edges or layer lines.
- Coarse Sandpaper: Start with coarse-grit sandpaper (100-200 grit) to remove larger imperfections.
- Fine Sandpaper: Progress to finer grits (400-600 grit) for a smoother finish.
Pro Tip: Wet sanding can help reduce dust and achieve a smoother finish.
| Step | Action | Purpose |
|---|---|---|
| Remove Supports | Use pliers, clippers, or knife | Clean up the model |
| Coarse Sanding | Use coarse-grit sandpaper | Remove larger imperfections |
| Fine Sanding | Use fine-grit sandpaper | Achieve a smooth finish |
| Wet Sanding | Use water with sandpaper | Reduce dust, smoother finish |
Painting and Finishing
Priming
Priming prepares the model for painting by creating a uniform surface.
- Spray Primer: Apply a thin, even coat of primer.
- Distance: Hold the spray can about 6-8 inches away from the model.
- Drying: Allow the primer to dry completely before painting.
Painting
Painting adds color and detail to your model.
- Acrylic Paints: Use acrylic paints for their versatility and ease of use.
- Brushes: Use fine brushes for detailed work and larger brushes for broad areas.
- Airbrushing: For a professional finish, consider using an airbrush.
- Technique: Apply thin, even coats to avoid drips and runs.
Sealing
Sealing protects the paint and adds a professional touch.
- Clear Sealant: Apply a clear sealant spray to protect the paint.
- Finish: Choose between matte, satin, or gloss finishes based on your preference.
Detailing
Add final touches to enhance the realism of your model.
- Weathering: Use weathering techniques to add age and wear to your model.
- Tools: Use brushes, sponges, and pastels for realistic effects.
- Decals: Apply decals for added detail and accuracy.
| Step | Action | Purpose |
|---|---|---|
| Priming | Apply spray primer | Prepare surface for painting |
| Painting | Use acrylic paints or airbrush | Add color and detail |
| Sealing | Apply clear sealant | Protect paint, add finish |
| Weathering | Use brushes, sponges, pastels | Add realism and age |
| Decals | Apply decals | Enhance detail and accuracy |
Post-processing is an essential part of the DLP printing workflow, transforming raw prints into polished, professional models. By following these steps—cleaning, curing, removing supports, sanding, painting, and finishing—you can significantly enhance the quality and appearance of your architectural models.
Enhancing Architectural Models with DLP Printing
DLP printing opens up a world of possibilities for creating detailed and intricate architectural models. By leveraging advanced techniques and thoughtful design, you can elevate your models to new heights. This section explores ways to enhance your architectural models using DLP printing technology.
Design Considerations
Emphasizing Detail
- High-Resolution Models: Use high-detail resins to capture intricate architectural features.
- Layer Height: Opt for a smaller layer height to improve surface smoothness and detail.
Structural Integrity
- Support Structures: Design effective support structures to prevent sagging or warping.
- Wall Thickness: Ensure walls are thick enough to provide stability without sacrificing detail.
| Aspect | Considerations | Benefits |
|---|---|---|
| High-Resolution Models | Use detailed resins | Capture intricate features |
| Layer Height | Choose smaller layer height | Improve smoothness and detail |
| Support Structures | Design effective supports | Prevent sagging or warping |
| Wall Thickness | Ensure adequate thickness | Provide stability |
Incorporating Realism
Textures and Patterns
- Surface Textures: Add realistic textures to surfaces, such as brick or stone patterns.
- Custom Patterns: Use CAD software to integrate custom patterns that enhance realism.
Scale and Proportion
- Accurate Scaling: Ensure the model is accurately scaled to represent the real structure.
- Proportional Elements: Pay attention to the proportion of windows, doors, and other features.
| Aspect | Considerations | Benefits |
|---|---|---|
| Surface Textures | Add realistic textures | Enhance visual appeal |
| Custom Patterns | Integrate unique patterns | Increase model realism |
| Accurate Scaling | Ensure correct scale | Represent real structure |
| Proportional Elements | Maintain element proportions | Achieve realistic representation |
Advanced Techniques
Multi-Material Printing
- Different Resins: Use various resins to achieve different textures and strengths within a single model.
- Transparent Elements: Incorporate transparent resins for windows and glass features.
Modular Design
- Interlocking Parts: Design models with interlocking parts for easy assembly and transport.
- Expandable Sections: Create expandable sections for detailed interior views.
| Technique | Considerations | Benefits |
|---|---|---|
| Different Resins | Use various resins for texture and strength | Enhance model functionality |
| Transparent Elements | Incorporate clear resins | Add realistic glass features |
| Interlocking Parts | Design for easy assembly | Simplify transport and assembly |
| Expandable Sections | Create detailed interiors | Showcase interior design |
Post-Processing Enhancements
Painting and Weathering
- Realistic Painting: Use techniques like airbrushing for a professional finish.
- Weathering Effects: Apply weathering to add age and character to the model.
Lighting and Electronics
- LED Lighting: Integrate LED lights to illuminate interiors or highlight features.
- Interactive Elements: Add moving parts or interactive features for dynamic models.
| Enhancement | Considerations | Benefits |
|---|---|---|
| Realistic Painting | Use airbrushing techniques | Achieve a professional finish |
| Weathering Effects | Apply aging techniques | Add character and realism |
| LED Lighting | Integrate lighting elements | Illuminate and highlight features |
| Interactive Elements | Add moving or interactive parts | Create dynamic models |
Enhancing architectural models with DLP printing involves a blend of creative design, advanced techniques, and thoughtful post-processing. By focusing on detail, realism, and functionality, you can create models that truly stand out and captivate viewers.
Future Trends in DLP Printing for Architecture
As technology continues to advance, DLP printing is poised to play an increasingly significant role in architecture. This section explores emerging trends and future possibilities that could transform how architects and designers approach model-making and construction.
Advanced Materials
Smart Resins
Overview: The development of smart resins that can change properties in response to environmental stimuli.
Potential Benefits:
- Adaptive Models: Models that can change color or transparency based on light or temperature.
- Self-Healing: Resins that can repair minor damages automatically.
Biodegradable Resins
Overview: Use of environmentally friendly, biodegradable resins.
Potential Benefits:
- Sustainability: Reduce environmental impact by using materials that decompose naturally.
- Eco-Friendly Projects: Appeal to clients and stakeholders focused on sustainability.
| Trend | Overview | Potential Benefits |
|---|---|---|
| Smart Resins | Change properties based on stimuli | Adaptive models, self-healing |
| Biodegradable Resins | Environmentally friendly materials | Sustainability, eco-friendly projects |
Integration with BIM and CAD
Enhanced Interoperability
Overview: Improved integration between DLP printing and Building Information Modeling (BIM) or Computer-Aided Design (CAD) software.
Potential Benefits:
- Seamless Workflow: Directly print models from BIM/CAD files without extensive conversion.
- Real-Time Updates: Automatically update physical models based on changes in digital plans.
Parametric Design
Overview: Use of parametric design in conjunction with DLP printing.
Potential Benefits:
- Customizable Models: Easily create variations of a model by adjusting parameters.
- Complex Geometries: Print intricate designs that would be difficult to create manually.
| Trend | Overview | Potential Benefits |
|---|---|---|
| Enhanced Interoperability | Improved integration with BIM/CAD | Seamless workflow, real-time updates |
| Parametric Design | Use of adjustable parameters in design | Customizable models, complex geometries |
Automation and AI
Automated Support Generation
Overview: AI-driven software that automatically generates optimal support structures.
Potential Benefits:
- Efficiency: Save time by automating the support design process.
- Precision: Ensure supports are placed in the most effective positions.
Predictive Maintenance
Overview: Use of AI to predict when maintenance is needed for DLP printers.
Potential Benefits:
- Reduced Downtime: Prevent unexpected printer failures by performing maintenance proactively.
- Cost Savings: Extend the lifespan of equipment and reduce repair costs.
| Trend | Overview | Potential Benefits |
|---|---|---|
| Automated Support Generation | AI-driven support design | Efficiency, precision |
| Predictive Maintenance | AI predicts maintenance needs | Reduced downtime, cost savings |
Large-Scale Printing
Construction-Scale DLP Printing
Overview: Development of large-scale DLP printers capable of producing building components or entire structures.
Potential Benefits:
- Efficiency in Construction: Reduce construction time by printing components directly on-site.
- Customization: Easily create unique, custom-designed building elements.
Modular Construction
Overview: Use of DLP printing to create modular components that can be assembled into larger structures.
Potential Benefits:
- Flexibility: Easily modify or expand structures by adding or replacing modules.
- Transportability: Simplify transport and assembly of building components.
| Trend | Overview | Potential Benefits |
|---|---|---|
| Construction-Scale DLP Printing | Large-scale printers for building components | Efficiency, customization |
| Modular Construction | Create modular components for assembly | Flexibility, transportability |
Mixed Reality Integration
Augmented Reality (AR) and Virtual Reality (VR)
Overview: Integration of DLP printing with AR/VR technologies to enhance design and presentation.
Potential Benefits:
- Interactive Models: Allow clients to interact with digital and physical models simultaneously.
- Enhanced Visualization: Use AR/VR to visualize changes and updates to models in real-time.
Digital Twins
Overview: Creation of digital twins—virtual replicas of physical models—for simulation and analysis.
Potential Benefits:
- Real-Time Monitoring: Monitor and analyze the physical model’s performance using its digital twin.
- Predictive Analysis: Use simulations to predict and address potential issues before they arise.
| Trend | Overview | Potential Benefits |
|---|---|---|
| Augmented Reality (AR) and Virtual Reality (VR) | Integration for enhanced design and presentation | Interactive models, enhanced visualization |
| Digital Twins | Virtual replicas of physical models | Real-time monitoring, predictive analysis |
The future of DLP printing in architecture is bright, with numerous trends and advancements on the horizon. From advanced materials and enhanced software integration to automation and large-scale printing, these innovations promise to revolutionize how architectural models are created and used.
By staying informed about these trends and adopting new technologies, architects and designers can continue to push the boundaries of their craft, creating more detailed, accurate, and sustainable models. Embrace the future of DLP printing and explore the limitless possibilities it offers for architectural innovation.