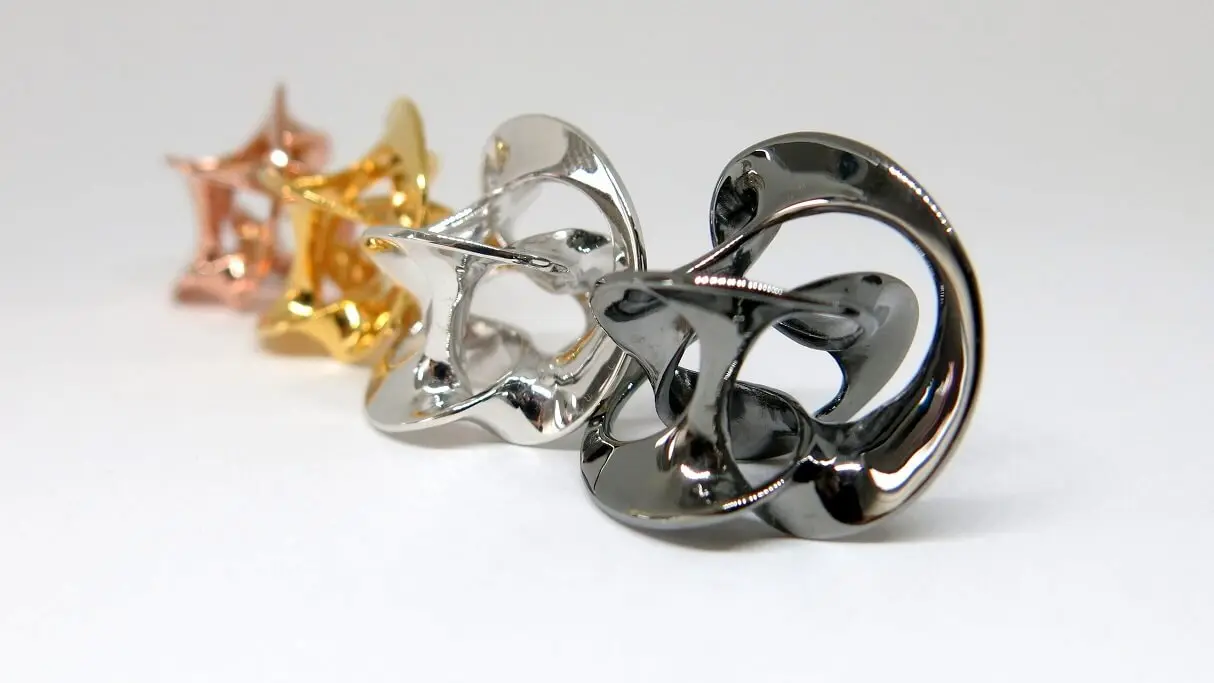
In this detailed world of delicate craftsmanship, the two watersheds of perfection are precision and customization. Much more, as technology has advanced, every artisan or designer looks for a process that could better their creativity and work efficiency. One such process, in fact technology, is DLP, which stands for Digital Light Processing. But the invention is in the top-down DLP 3D printing process, thousands of ways in which jewelry making has been revolutionized.
This guide will walk you through the realm of top-down DLP 3D printing—a world with no rival when it comes to precision and the freedom to work with the most delicate designs that traditional methods turn away from. Whether you are an advanced jeweler or a beginner interested in getting started, understanding how to harness this technology will change how you approach the design of jewelry. The process from design to final product is state-of-the-art in this old-world art of jewelry making.
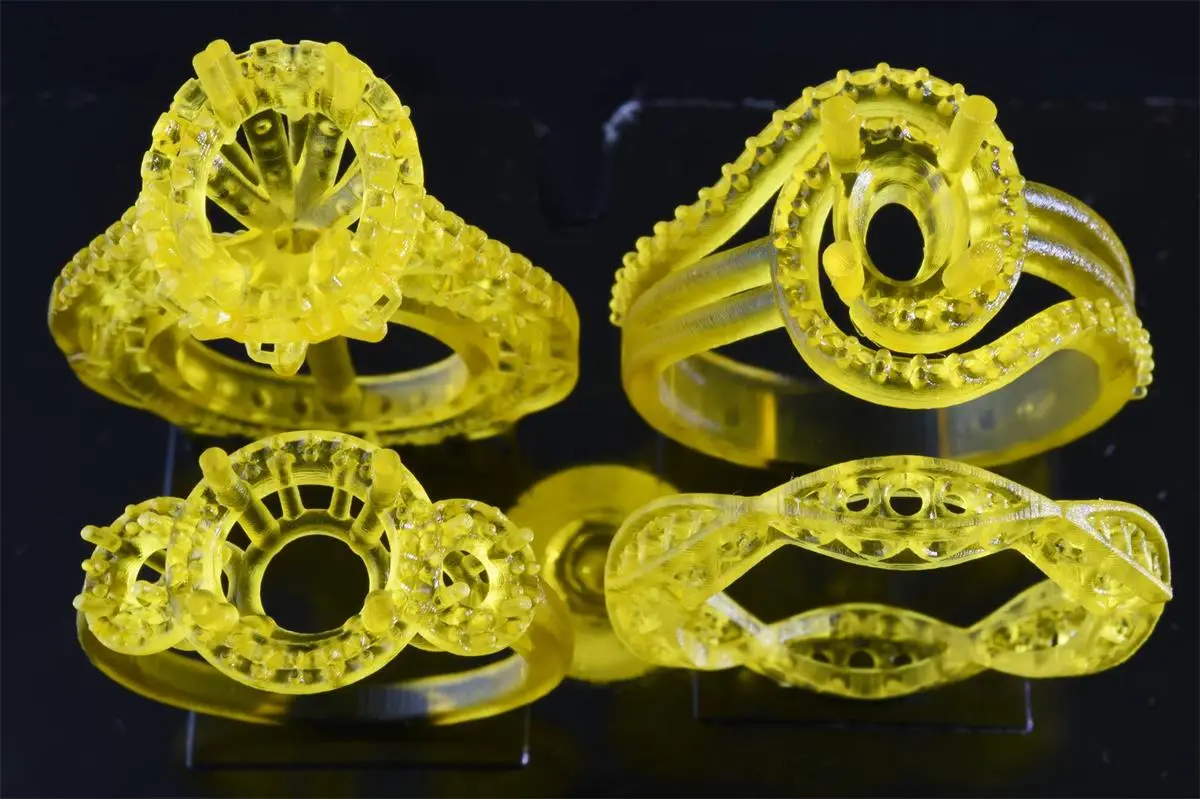
We’ll start with what DLP 3D printing is and compare its pros and cons regarding other 3D printing technologies. We will then take you step by step from equipment setup, design, and 3D modeling preparation to the actual printing and post-processing of your exquisite jewelry pieces. By the end of this manual, you will have the know-how to start developing such stunning, intricate jewelry designs high in quality and rich in detail.
Get ready to go on a journey that combines the ancient attraction of jewelry with state-of-the-art possibilities in top-down DLP 3D printing, making your creations stand out in the noise of the custom jewelry market.
Understanding DLP 3D Printing for Jewelry Making
Digital Light Processing is another breakthrough improvement in what 3D printing can do, especially when applied to the very precise and intricate world of jewelry making. This section will talk about what DLP 3D printing is, how it works, and why the top-down approach truly benefits a jeweler looking to reach detailed and delicate designs.
What is DLP 3D Printing?
DLP 3D printing is one of the additive manufacturing processes whereby a liquid photopolymer resin is cured using a digital light projector layer by layer. The process projects only an image of each entire layer, setting it faster than point lasers such as stereolithography.
Key Components of DLP 3D Printers:
Light Source: normally an LED or traditional projector lamp.
• Resin Tank: This holds the photopolymer resin.
• Build Plate: This is the plate on which the object is formed; it moves up a little after a layer is cured.
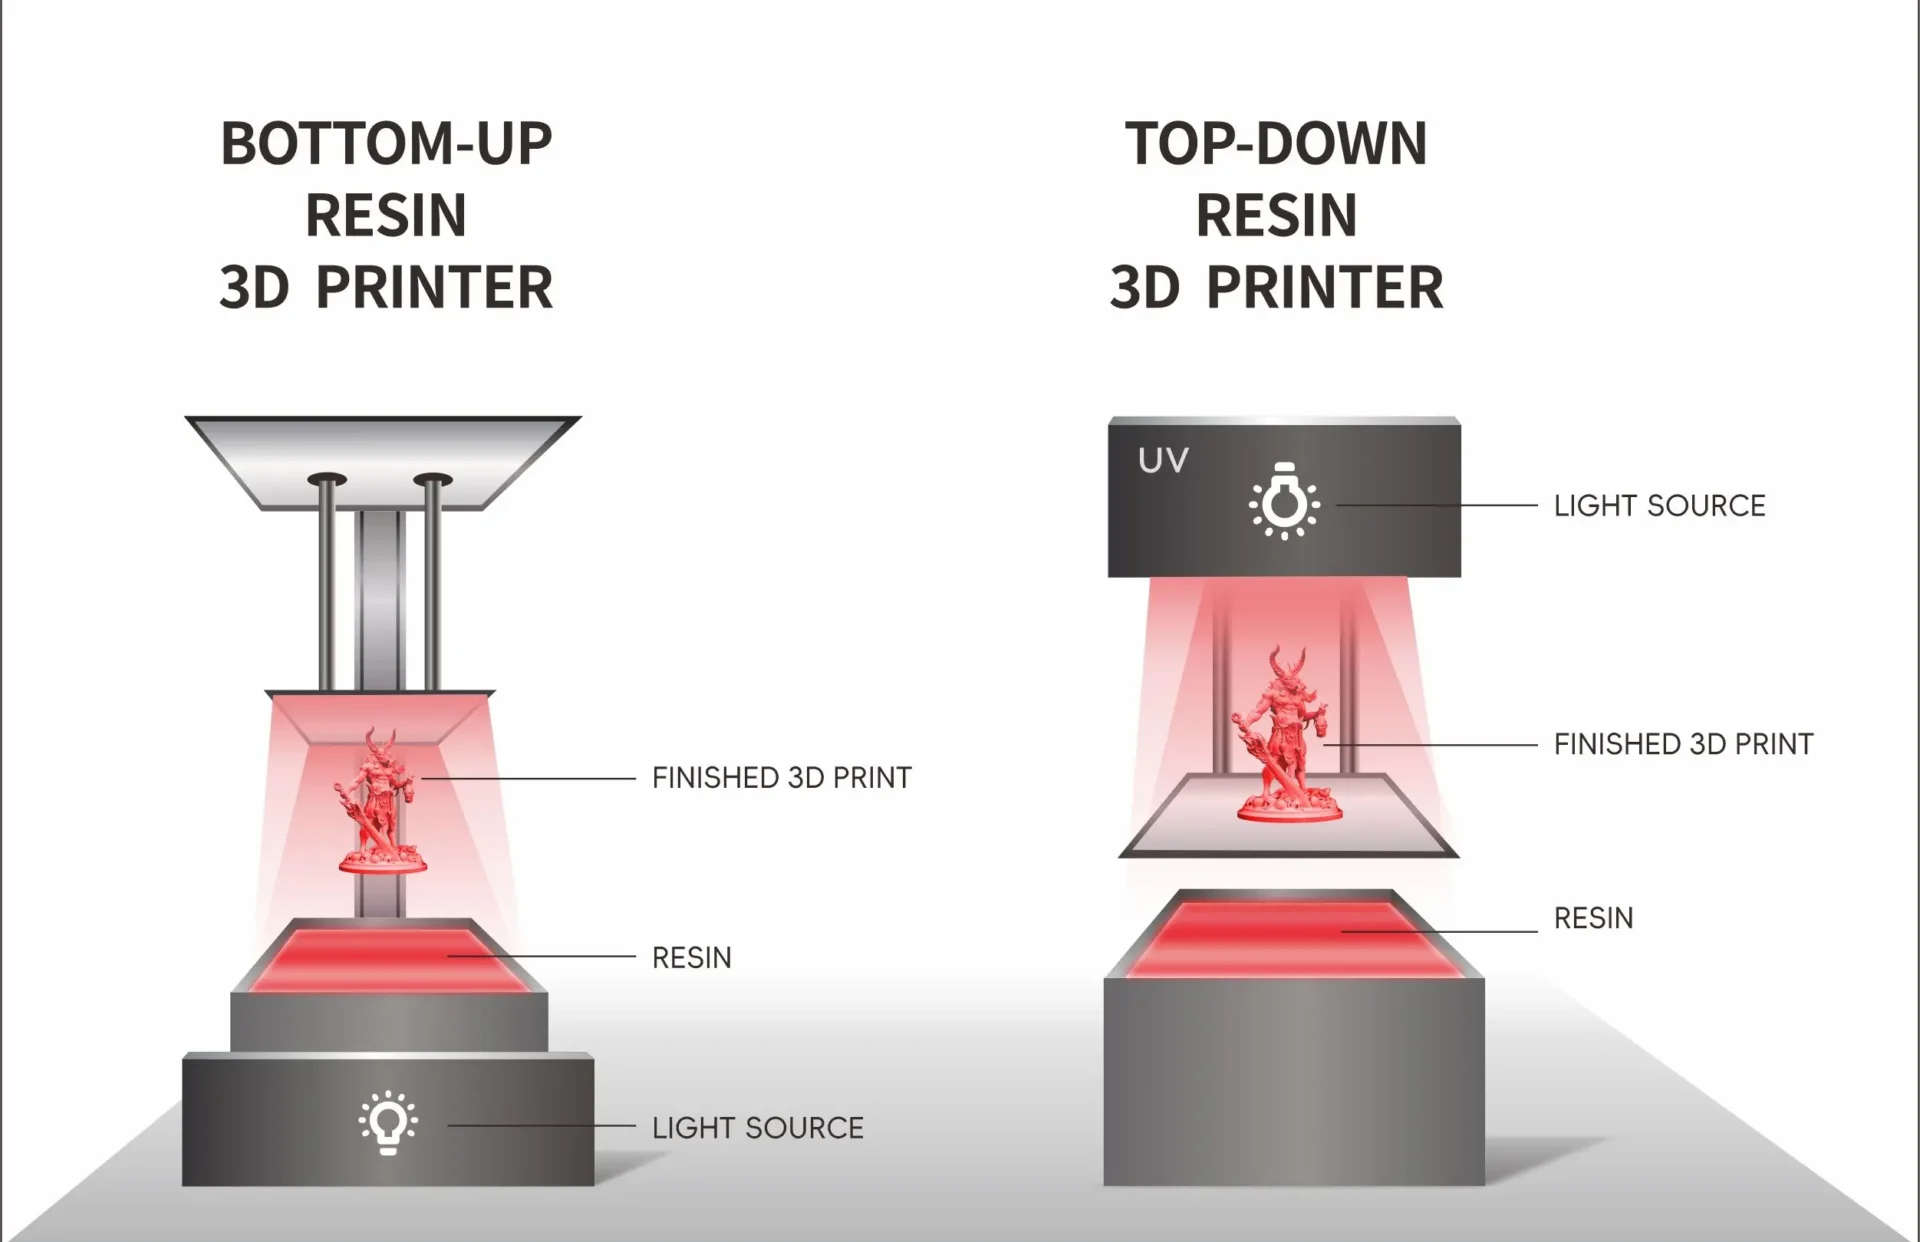
Top-Down vs. Bottom-Up DLP Printing
With bottom-up printing, the build plate is at the very bottom of the resin tank, oriented face up. This is common, but it has its problems, associated mainly with the production of large objects or heavy ones, since they may create stresses that pull them away from the build plate.
In turn, the top-down DLP printing method places the build plate above the resin tank and moves downward into the resin. This orientation confers some advantages for jewelry making, including:
- Less peeling forces: No forces from sticking to the floor of the tank, hence less failure due to peeling.
- More suitable for large pieces: It is able to hold a heavier and larger print without distortion.
Material Conservation: Consumes only the amount of resin necessary for the print, limiting waste.
Advantages of Top-Down DLP Printing in Jewelry Making
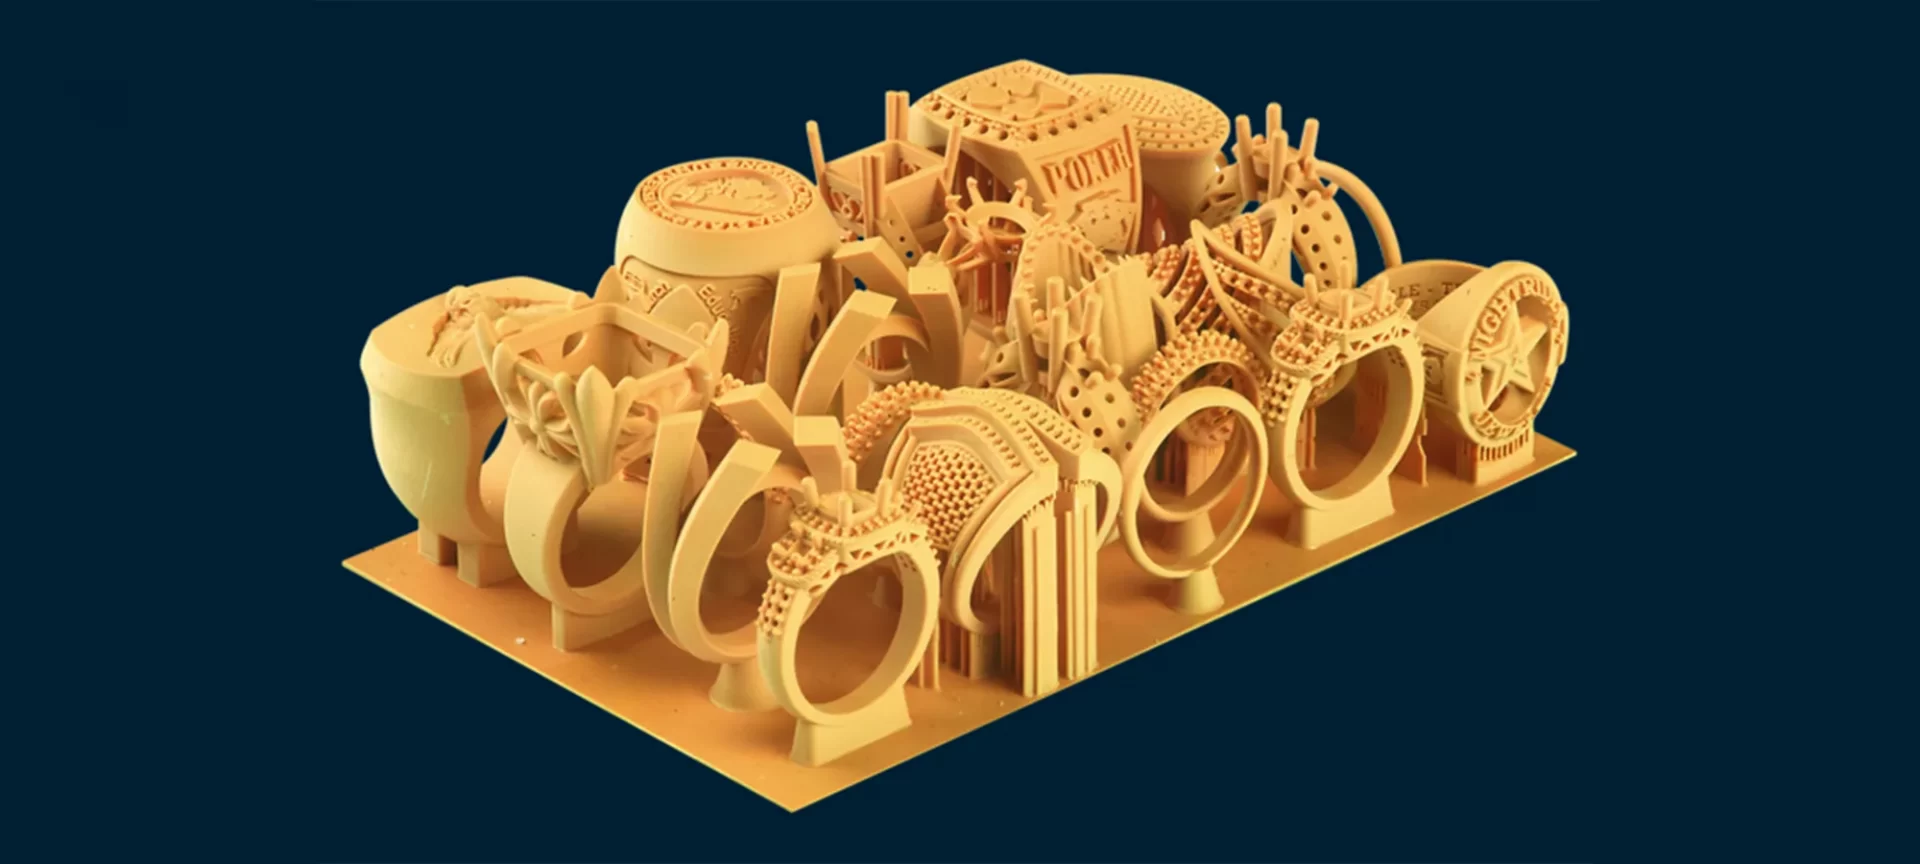
The top-down approach offers specific advantages that work best in fine jewelry manufacturing:
- High Detail and Precision: Allows for complex patterns and fine features which cannot be attained through traditional ways of crafting;
- Smooth Surface Finish: It creates pieces with less marking and imperfection, hence providing less post-processing work.
- Efficient Production: This can produce numerous pieces at one time, making it perfect for batch production or custom orders.
Materials Used in DLP Printing
Selecting the correct resin is quite critical for the aesthetic and functional aspects a jeweler wants in his product. The following are the most common types of resin used in DLP printing for jewelry:
| Type of Resin | Properties | Best for |
| Castable | Burns out cleanly without residue | Making molds for metal casting |
| Flexible | Mimics the flexibility of rubber | Bracelets and wearable jewelry |
| Tough | High strength and durability | Functional parts of jewelry |
| Water Clear | Transparent and can be colored | Gem-like features |
Safety and Handling:
- Ventilation: Ensure proper ventilation since there are many fumes and odors coming from the resins.
- Protective Gear: Gloves and protective eyewear shall be worn when handling resins at all times.
Knowing how DLP 3D printing works and the advantages of a top-down approach will enable a jewelry maker to exploit this new technology. With the right materials and exploiting the unique benefits of top-down DLP, it is possible for a jeweler to extend the creative boundaries and generate pieces that are not only beautiful but also structurally sound.
Getting Started with Top-Down DLP 3D Printing for Jewelry Making
Entering the world of top-down DLP 3D printing of jewelry means you want to understand the primary equipment and correct setup, among other design considerations. This section will guide you on how to start your journey into making exquisite and intricately detailed jewelry pieces using this advanced technology.
Equipment and Setup
The first step before you plunge into the world of 3D printing would be to arm yourself with a basic set of tools. Here are the very basic elements needed to get you started:
- Top-Down DLP 3D Printer: Choose the model which serves your jewelry making needs based on parameters such as build volume and resolution.
- High-Quality Resin: Use those resins appropriate for jewelry making, such as castable resins to duplicate pieces in metal or water-clear resins when you want a gem-like piece of jewelry.
- Resin Curing Station: This is needed for setting the resin on the final product after printing. It comes out strong and ready to finish.
- Protective gear: Gloves, masks, safety glasses
- Cleaning supplies: Isopropyl alcohol, paper towels, wash station .
Initial Setup and Configuration Tips:
Set up a clean, dust-free, and well-ventilated area.
• Printer Calibration: Calibration of the printer according to manufacturer’s instructions to achieve optimum results.
• Resin Preparation: A well-mixed resin that is poured in the tank with no bubbles and a nice flow.
Designing for DLP
Producing an attractive yet printable design requires insight into both 3D modeling software and what the DLP printer can do.
Software for Jewelry Design:
• CAD Software: State-of-the-art software to create accurate jewelry design includes Rhino, Matrix, or Blender.

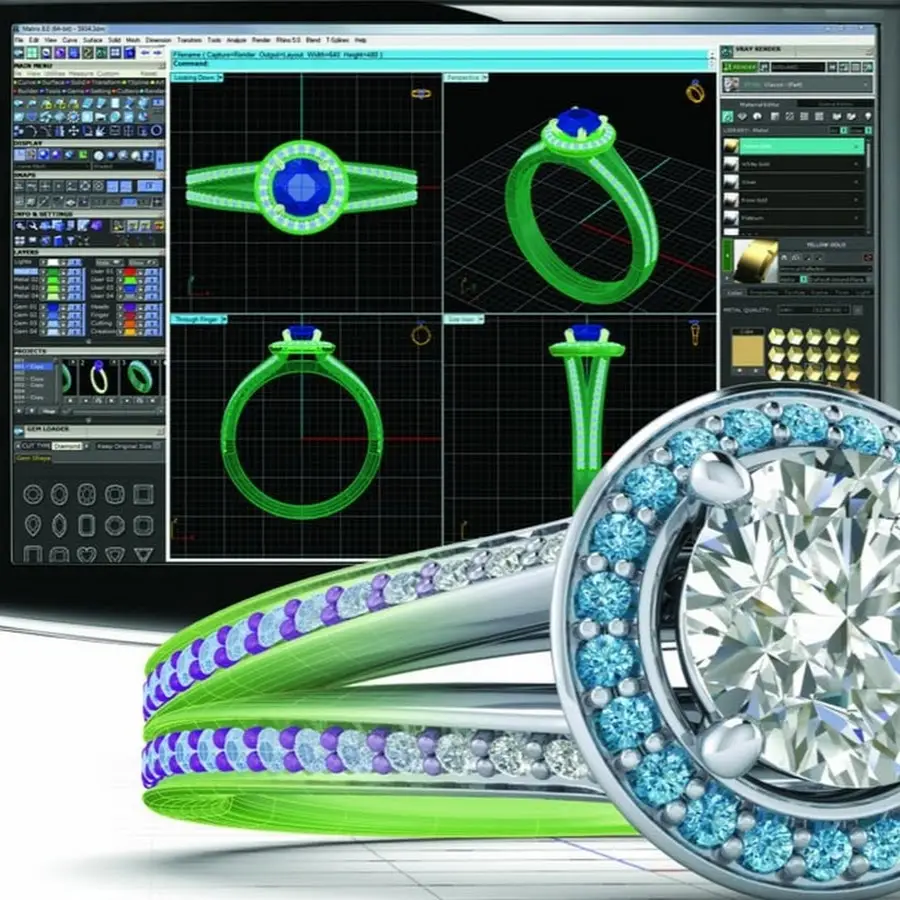
• DLP-Specific Software: ChiTuBox or Formware 3D with features focused on preparing models for DLP printing.
Tips on How to Optimize Designs for DLP Printing:
• Orientation: Parts should be oriented in such a way that it achieves minimum supports and minimum needs for post-processing work.
• Supports: Add supports where necessary without overdoing it to maintain the integrity of the design.
- Hollowing: Thin parts of the model and drain holes will help to reduce the amount of resin used and guarantee faster printing.
Preparing the 3D Model
Now that you have your design ready, it will need to be prepared for printing through a process called slicing, which converts the model into layers that the printer understands.
Step by Step Instructions on How to Prepare Your Model:
- Import Your Design: Open your 3D model in the slicing software.
- Model Checking: Use software tools to check for any mistakes in the model, such as holes or non-manifold edges; fix if found.
- Slicing the Model: Change in layer height and exposure times are dependent on the resin used and details desired.
- Preview and Adjust: Preview the slice to be sure everything looks correct; change any settings as necessary.
Important Settings and Parameters for Jewelry
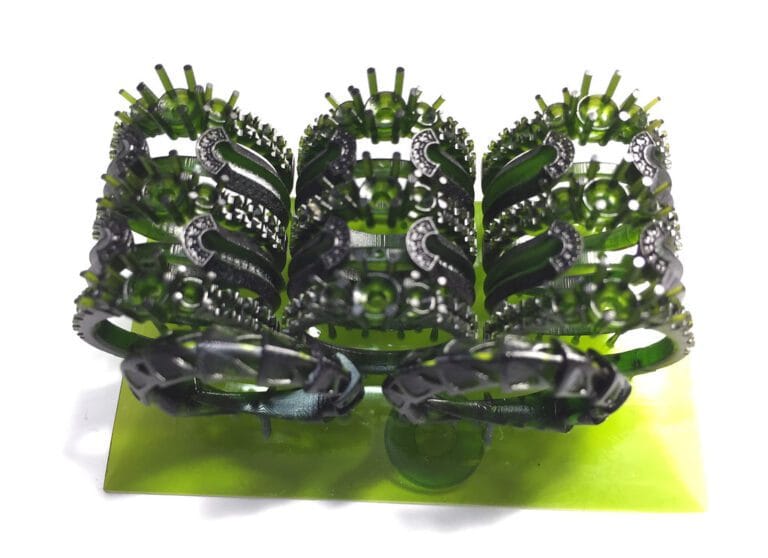
- Layer Height: Finer layer heights can replicate more details onto the object to be printed, specifically fine jewelry.
- Exposure Settings: Proper exposure ensures that every layer is cured correctly for optimal results.
- Lift Speed: Adjust the lift speed of the build platform to avoid pulling forces on the model during separation.
The ability to remain conscious of the specifications regarding equipment, setup, and design requirements for top-down DLP 3D printing will help you start Jewelry making projects without problems. From design to slice, every step is critical to the final output of your piece, which demands accuracy and careful planning. Becoming comfortable with these first few steps will also empower you to take on the vast creative possibilities that DLP 3D printing has for a modern jeweler.
The Printing Process: Mastering Top-Down DLP 3D Printing for Jewelry
Once your designs are ready and your printer is set up, it will be time to get down to some real printing. Top-down DLP 3D printing is sure to bring in unique advantages in jewelry making, even though mastering the process takes an understanding of every step—from starting a print to monitoring and intervening if necessary. This section will get you through these critical stages that guarantee your jewelry pieces print out with precision and quality.
Step-by-Step Printing Guide
Getting into the actual printing can be intimidating, but in reality, it is pretty much straight forward if taken in an organized manner. The systematic approach will help realize good results from this process.
Pre-Printing Checklist:
- Checking of Resin: This involves ensuring the resin has been well mixed and is free from contaminants.
- Calibration of the Machine: This step will ensure that the calibration settings are correct.
- File Preparation: The sliced file needs to be loaded into the printer, and the model should have the correct orientation with necessary supports provided.
Starting the Print:
- Warm up the Printer: turn it on and let all systems get up and running.
- Fill up the Resin: slowly pour in the prepared resin into the tank; do not overfill.
- Start Printing: using the printer’s control interface or a connected computer, start the print.
Monitoring and Managing the Print
Monitoring the print, especially in the active sense, is critical to catching and correcting any issues that may affect the quality of jewelry produced .
Areas of Importance to Monitor:
Layer Adhesion: Observe the adhesion between layers, which could cause print failures due to poor adhesion.
Curing Resin: Observe that every layer is curing properly. Under-cured resin may be the cause of the blur of details or their deformation.
Printer Behavior: Observe unusual noises and movements that will become the sign of mechanical issues.
Interventions if Necessary:
Pause and Inspect: If you find any discrepancies, do not hesitate to pause the print and inspect.
- Adjust Settings: Dynamic adjustment of exposure times or lift speeds to correct an ongoing problem.
- Resume or Restart: Based on your assessment, you can either resume the print or start over, using adjusted settings.
Common Issues and Troubleshooting Tips
Despite best efforts, issues may arise. Here are some common problems and how to address them:
| Problem | Symptom | Solution |
| Poor Adhesion | Parts of the print fail to stick | Increase base layer exposure or recalibrate |
| Incomplete Curing | Soft or tacky layers | Adjust resin exposure settings |
| Mechanical Failures | Unusual noises or halted print | Check mechanical parts for wear or misalignment |
Post-Print Steps:
After the print completes, a few critical steps remain:
- Remove the Print: Carefully lift the finished piece from the build plate.
- Clean Up: Use isopropyl alcohol to wash off any uncured resin from the print.
- Post-Curing: Expose the print to UV light to fully cure and harden the material.
The secret to high-quality results in jewelry lies in understanding and managing the printing process. Keep a close eye on the print, and as needed, make some adjustments to ensure that what comes out of each piece is according to your standards in artistry and quality. This shall improve one’s skillset but will also deepen appreciation of the artistic and scientific sides of 3D-printed jewelry.
Post-processing Techniques for Top-Down DLP 3D Printed Jewelry
This post-processing stage after printing your jewelry pieces is essential for bringing out their beauty and full functionality. This chapter will therefore describe the techniques that are vital for cleaning, curing, and finishing top-down DLP 3D printed jewelry so that every piece has professional results and is also durable and ready to be worn.
Cleaning and Curing
As soon as pieces come out from a print, they will have residual uncured resin on their surface. It must be cleaned correctly and cured for optimal results.
Step-by-Step Cleaning Guide
- Remove Jewelry from the Build Plate: Gently use a non-abrasive tool to scrape off the piece from the build plate without damaging the fine details of it.
- Isopropyl Alcohol Rinse: Place the print in a container of IPA; let it soak for 5-10 minutes to remove any uncured resin.
- Ultrasonic Cleaning: An ultrasonic cleaner can be used to clean small, detailed parts as a nonabrading rinse for resin in areas that are hard to reach.
- Air Dry: Let the piece air dry on a clean paper towel or cloth to prevent water spots or residue.
Curing the Resin:
- UV Light Curing: Place the cleaned jewelry under UV light, either from a dedicated curing station or the direct sunlight, for a period depending on the type and thickness of the resin.
- Time and Exposure: Typically, 10-30 minutes under a UV lamp or some hours in the sun. Always remember to rotate for even exposure.
Finishing Techniques
It can add an aesthetic and a physical property to the printed jewelry by using many techniques of refinement on the surface and edges at this stage.
Sanding and Polishing:
- Sanding: Start sanding with a more coarse grit paper to remove any obvious imperfections or support marks, then progress to higher grits.
- Polishing: By using a polishing cloth with a suitable compound or in a buffing wheel, a high gloss finish is achieved.
Adding Details and Colors:
Dyeing: To create bright coloring or subtle shades, the piece can be submerged in a dye bath to enhance its appeal.
Painting: Use acrylic or enamel paints to add minute details or for contrast with a fine brush.
Quality Control
The finished pieces shall be passed on to quality control in order to meet any standards desired.
Quality Control Checklist:
• Visual Inspection: Check for any remaining marks or scratches on the work or uneven surfaces.
• Functional Testing: Check clasps, hinges; settings must be working properly, not too tight or too loose.
• Fit Test: If relevant, check to see that the piece fits the intended size or matches the specified dimensions.
- Proper Ventilation: Make sure that your working space is well-ventilated, especially when a solvent is in use or when spraying takes place.
- Waste Disposal: Dispose of resin wastes and contaminated material in accordance with the local regulations to ensure environmental safety.
Mastering the techniques of post-processing not only guarantees that your jewelry pieces will be durable and appealing but also boosts the general fineness of the craftwork. Each stage, from cleaning to finishing, independently contributes much to add value to the finished product and places your work in a niche of distinction within the competitive world of jewelry design. It is by paying attention to such details that you will be able to turn a simple print into stunning artwork, ready for showing or for sale.
Jewelry Quality Control and Testing of Top-Down DLP 3D Printing
After meticulous design, print, and post-process of jewelry, it is done perfectly for quality checking before presenting to customers or adding it to the inventory. This section examines quality testing and control methods relating to your jewelry’s durability, aesthetic appeal, and general workmanship of the top-down DLP 3D printed jewelry, providing insights to help you effect the necessary adjustments and improvements.
Quality Test and Evaluation
This quality assessment is carried out immediately after post-processing, once the printing process has entirely completed, and involves various comprehensive checks.
Steps of Quality Assessment
- Visual check: Check the part in good lighting for any surface defects such as lumps, cuts, or uncured areas.
- Detail: Details need to be checked to make sure that all fine details have been built and are distinguishable.
- Consistency: Compare a part to an original design for dimensions and stylistic elements, which shine consistency.
Common Quality Issues and Their Solutions
| Issue | Possible Cause | Solution |
| Surface Imperfections | Inadequate post-processing | Increase sanding and polishing efforts or revisit cleaning methods. |
| Structural Weakness | Insufficient curing or improper resin mixing | Adjust UV curing time or resin parameters. |
| Detail Loss | Over-sanding or high layer thickness | Refine the sanding technique or adjust the printer’s layer height setting. |
Advanced Techniques and Materials for Top-Down DLP 3D Printing in Jewelry Making
As you become more confident in the fundamentals of top-down DLP 3D printing for jewelry, so you may further drive your creative potential and the quality of your products by researching advanced techniques and materials. In this section, new innovative approaches and state-of-the-art materials will be explained that turn ordinary designs into extraordinary designs, giving you that much-needed edge in the bespoke jewelry market.
Working with Advanced Materials
Whereas standard resins will work for most of your designs, using advanced materials will afford special properties and aesthetics that set your creations apart.
Advanced and Experimental Materials in a Nutshell:
High-Detail Resins: It provides finer details and smoother finishes—exactly what you need for intricate designs. Durable Resins: They offer added strength to models requiring high resistance against wear.
- Elastic Resins: Offer flexible connection between the parts of jewelry so that they would bend or flex without breaking.
- Hybrid Resins: Mixed with ceramics or metals to have an individual look and extra durability.
How to Test New Materials:
- Sample Testing: Run samples of your new resin before going on to full projects to test for different properties in various conditions.
• Checks on Compatibility: Ensure that the resin works well with your printer model and the curing processes involved.
• Different post-processing methods may be required for some of the advanced resins; therefore, adjust your techniques accordingly.
Integrating DLP Pieces with Traditional Jewelry Making
The integration of traditional jewelry making and parts created by the DLP process can be strikingly beautiful as it really brings together both worlds—the precision and artisanal craftsmanship.
Hybrid Techniques:
Metal Casting: Use DLP-printed models to create a mold for metal casting, which could allow production in precious metals like silver or gold. Setting stones can incorporate traditional stone setting techniques along with a DLP-printed base to be set into a part to enhance the luxury and appeal of a piece. Enameling applies the classic enameling technique to pieces created through DLP printing to deliver vibrant colors with a glass finish.
Case Studies or Examples:
- Example 1: A designer who casts for an engagement ring, creating them in castable resin, detailed models of bands, and then casting them in platinum and setting diamonds by conventional methods.
- Example 2: An artist who has been printing intricate cuff bracelets off flexible resin and does gold leaf detailing to provide class finishing touches to these articles.
Tips for Creative Designs
Consider this: Mastering the technology is only a part of pushing boundaries of creativity in how you apply it.
Design Innovation:
• Complex Geometries: Do designs that are just too complex to be achieved by traditional methods—things like interlocking patterns or intricate filigree—using DLP printing’s capabilities.
• Customization: Offer a service with which a customer gets a unique, personalized design that can be easily modified for clients, something traditional methods can’t efficiently offer.
Inspiration and Conceptual Ideas:
• Nature-Inspired Designs: Take flora, fauna, or maybe even the topography of landscapes to serve as an inspiration for you in nature.
• Reviving the Art Deco: Besides symmetry in design, bold geometric shapes are the underlying essence of this artistic style of yesteryears, which, with the precision DLP can give, can really nail those styles.
Embracing advanced materials and techniques in conjunction with your traditional jewelry making skills only broadens the range of creative potential within your pieces, alongside broadening the market appeal for your product. Such efforts will thus enhance not only the quality and uniqueness of your products but also make you seem an innovator in the field of jewelry design. Keep experimenting and go on to further develop your approach so that you can be one step ahead in this fast-evolving world of 3D printed jewelry.
Conclusion: How to Leverage the Power of Top-Down DLP 3D Printing in Jewelry Making
This finally brings us to the end of our in-depth look into top-down DLP 3D printing for jewelry making. In this advanced technology, one can envision unmatched avenues of creativity, customization, and efficiency. Using top-down DLP 3D printing, a jeweler or designer may be able to scale new frontiers beyond the traditional limitations of the craft in order to create not just intricately beautiful pieces but uniquely individualistically catering to taste or need.
The Power of Top-Down DLP 3D Printing in Jewelry Production: A Recap
Top-down DLP 3D printing allows a jewelry maker to create such complex designs that it is hard to get, if not impossible, with other traditional techniques of manufacturing. It reduces production time and enhances productivity, enabling quicker turnarounds from design to finished product. This possibility of mass customization on a single piece, by a client’s specifications, without huge jumps in cost or time, is very powerful in this business.
- Better material use and sustainability, as digital manufacturing represents minimal waste compared to subtractive processes.
Encouragement to Experiment and Innovate
The journey into the world of 3-D printing is one of embracing new technology as much as it is about rethinking the approach toward jewelry design:
- Experimentation: Regular testing of various materials and settings for different designs should be done to find and finesse that which works best with your artistic vision and business model.
- Continual Learning: Keep updated on the latest developments with 3D printing technology and material sciences. Engage in forums, workshops, courses, and related events to keep your acumen sharp and insight current.
- Collaboration: Network with other designers, technologists, and artists, and seek interdisciplinary approaches which may yield new concepts and designs for jewelry.
Top-down DLP 3D printing is not a technique in itself, but a process—transformative, as it may be, in that it changes the very limits of possibility in jewelry. It is a process that will present challenges in the acquisition of new techniques and provide opportunities through the virtually limitless design possibilities that it opens up.
Let your creativity and passion for craftsmanship guide you. The jewelry making world is changing, and with top-down DLP 3D printing quite literally at your fingertips, you are primed to lead from the front line. Whether for one-off pieces commissioned by private clients or new collections targeted at larger markets, the ideas and methods in this guide will have you not just excelling but innovating in each piece you create.
Relate All in One Solutions
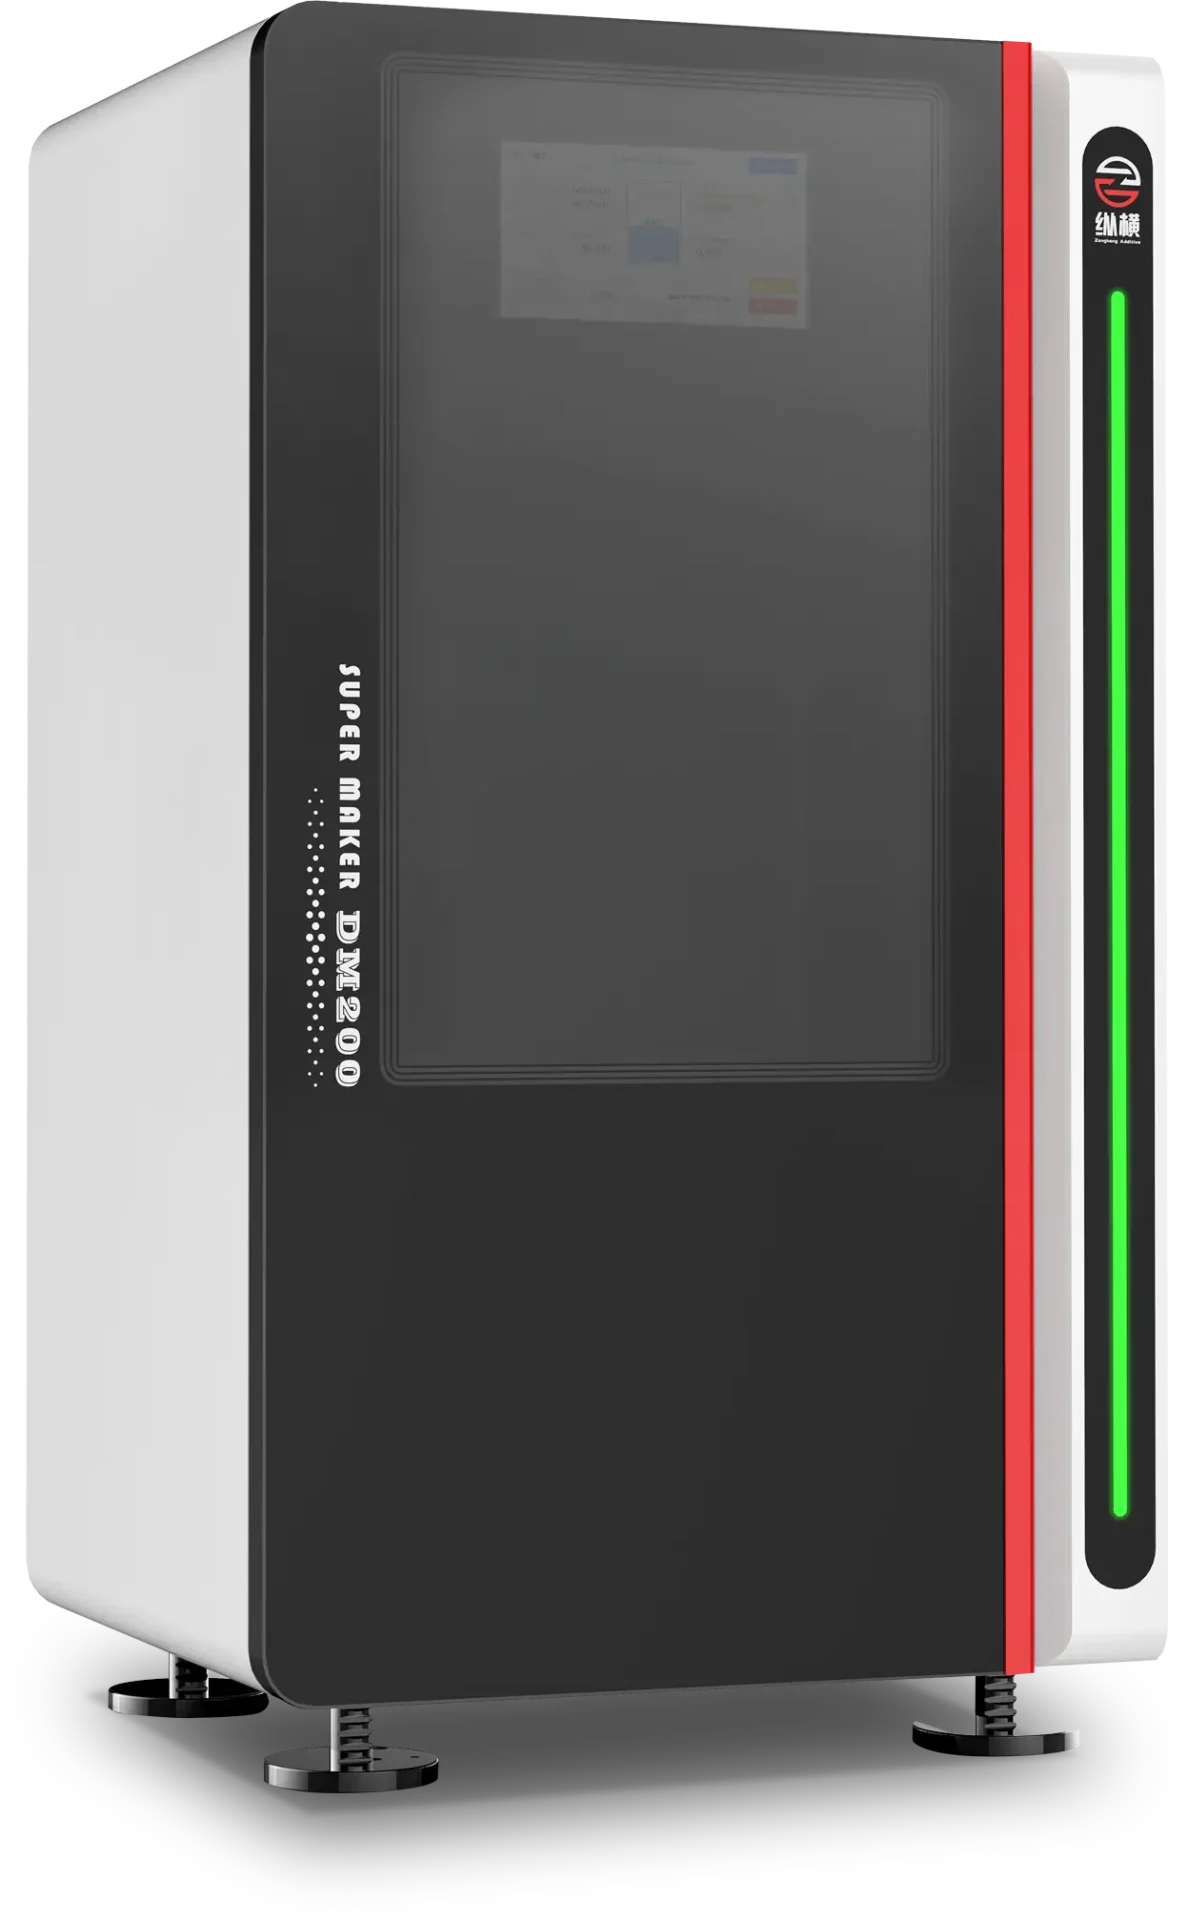
Super Maker DM200
Discover The Future Of High-Speed, High-Precision 3D Printing Start-Up machine.
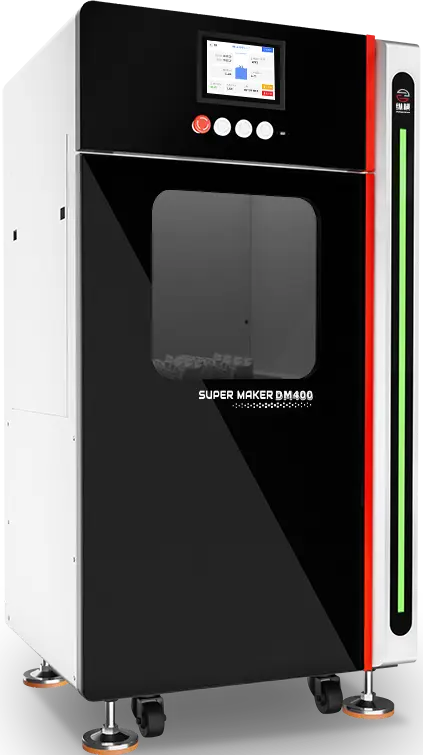
Super Maker DM400
Discover The Future Of High-Speed, High-Precision 3D Printing Start-Up machine.

