In the sea of technologies that exists within 3D printing, one really stands out: Selective Laser Sintering. It is the most accurate and versatile among the many methods developed to perform 3D printing. But what is SLS 3D printing, and why should a beginner get into this technology in 2024? Picture creating complex, highly resilient parts without supporting structures right from your home or workshop. It’s the promise of SLS 3D printing, once reserved for only industrial giants, now reaching both hobbyists and new alike.
The landscape of 3D printing has grown, and for those entering into it now, picking out the right SLS printer is going to get a lot more elusive. Of the many choices at one’s disposal, all with different features and capabilities, how does one know which one is best for them? That is exactly what this article seeks to do: detail key criteria needed in picking out an SLS 3D printer and introduce the top five models that stand out in the year 2024.
Whether you are a tech enthusiast who wants to explore new frontiers or a creative mind wanting to give life to your ideas, having a proper understanding of the SLS technology becomes necessary. We will dive into how SLS printing works, its advantages and potential drawbacks, and what makes a printer friendly to beginners. By the end of this article, you will be well equipped and ready to start your 3D printing processes.
Mastering SLS 3D Printing: The Ultimate Guide
SLS 3D printing has definitely been a commendable technology that transformed how we could all think about manufacturing and prototyping. Whether you are an experienced engineer or still a curious beginner looking to learn, the details of SLS are sure to reveal a whole new world of possibilities. We will cover how SLS 3D printing works, the pros and cons, and why it might just be the perfect choice for your next project in this very post.
How SLS 3D Printing Works
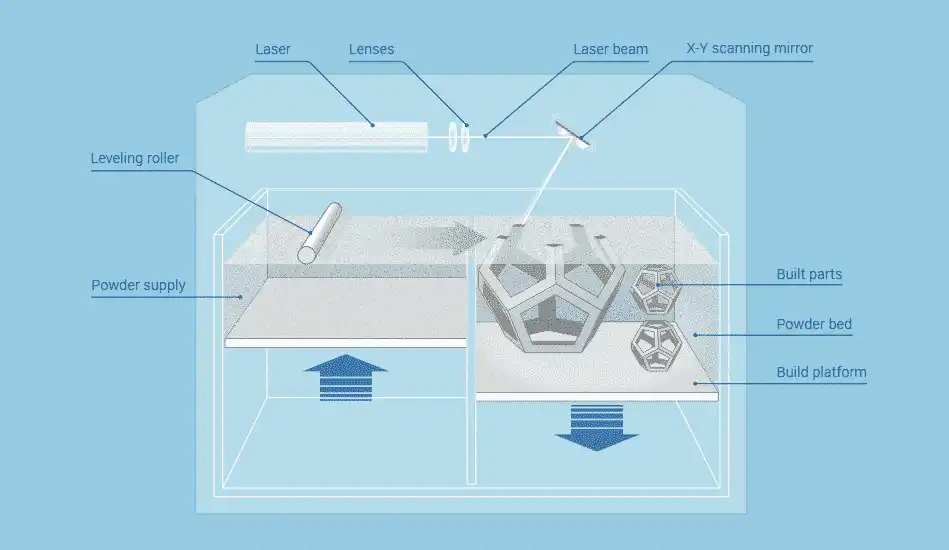
Basically, SLS 3D printing is a process whereby a high-powered laser is used to fuse small particles of a polymer powder into a solid structure. The following steps explain the whole process in detail:
- Preparation: Basically, it starts with a digital 3D model, which is then sliced into thin layers using some special software.
- Layering: A very fine layer of powder is spread across the build platform.
- Sintering: The laser fuses the powder particles selectively in line with the digital model, reifying the form.
- Iteration: The platform lowers and a new layer of powder is laid on top. This step may be repeated to form an entire object.
- Cooling and Cleaning: Allow the printed object to cool before removing from the printer and dusting off the extra powder.
Materials Used in SLS Printing
SLS is compatible with a variety of materials, each offering unique properties:
| Material Type | Properties | Common Uses |
| Nylon (PA12) | Durable, flexible, high impact resistance | Functional parts, complex assemblies |
| Glass-Filled Polyamide | Increased stiffness, good thermal properties | Automotive components, tooling |
| Alumide | Metallic appearance, good thermal properties | Decorative items, functional parts |
| Stainless Steel | High strength, corrosion resistance | Industrial parts, medical devices |
Advantages and Disadvantages of SLS 3D Printing
Like any technology, SLS 3D printing comes with its own set of pros and cons. Understanding these can help you decide if it’s the right fit for your needs.
Advantages:
- High Precision: SLS can produce intricate designs with fine details, making it perfect for complex geometries.
- No Support Structures Needed: Unlike other 3D printing methods, SLS doesn’t require support structures, reducing material waste.
- Durability: The resulting prints are strong and durable, suitable for functional parts and prototypes.
Disadvantages:
- Cost: SLS printers and materials can be expensive, especially for beginners.
- Complexity: The technology requires a certain level of expertise to operate effectively.
- Post-Processing: Cleaning and finishing the printed parts can be time-consuming.
Typical Applications and Industries
SLS 3D printing is not a technology developed only for hobbyists; it’s a wide-important technology in various industries:
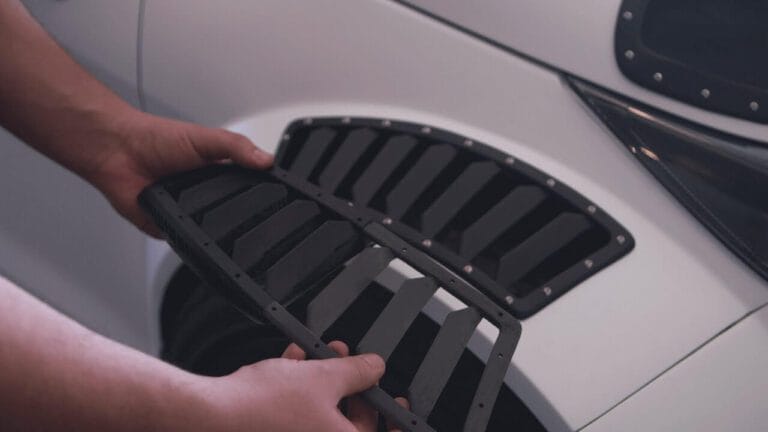
Automotive
It enables prototyping and the production of lightweight car components.
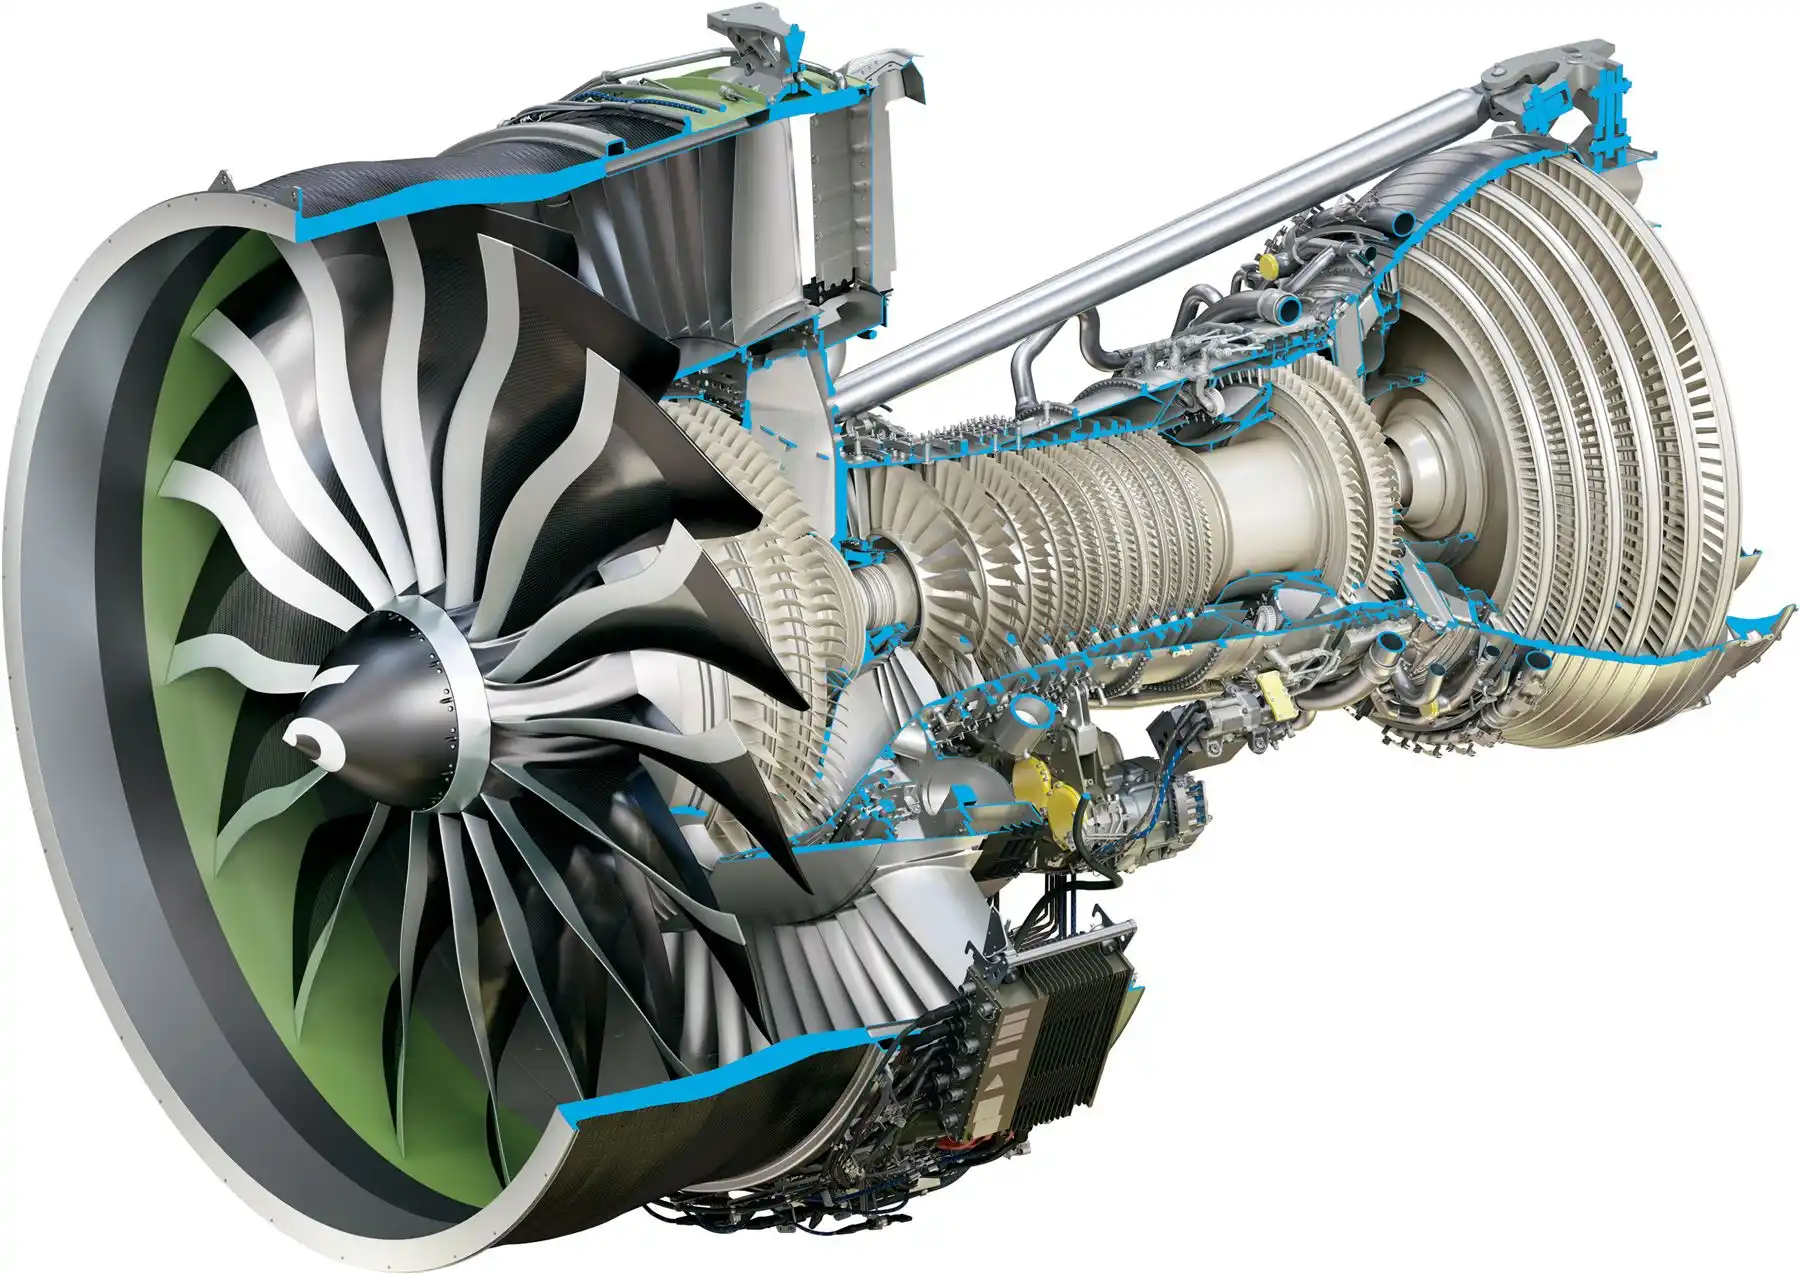
Aerospace
Applied in the production of highly complex parts with high strength-to-weight ratio
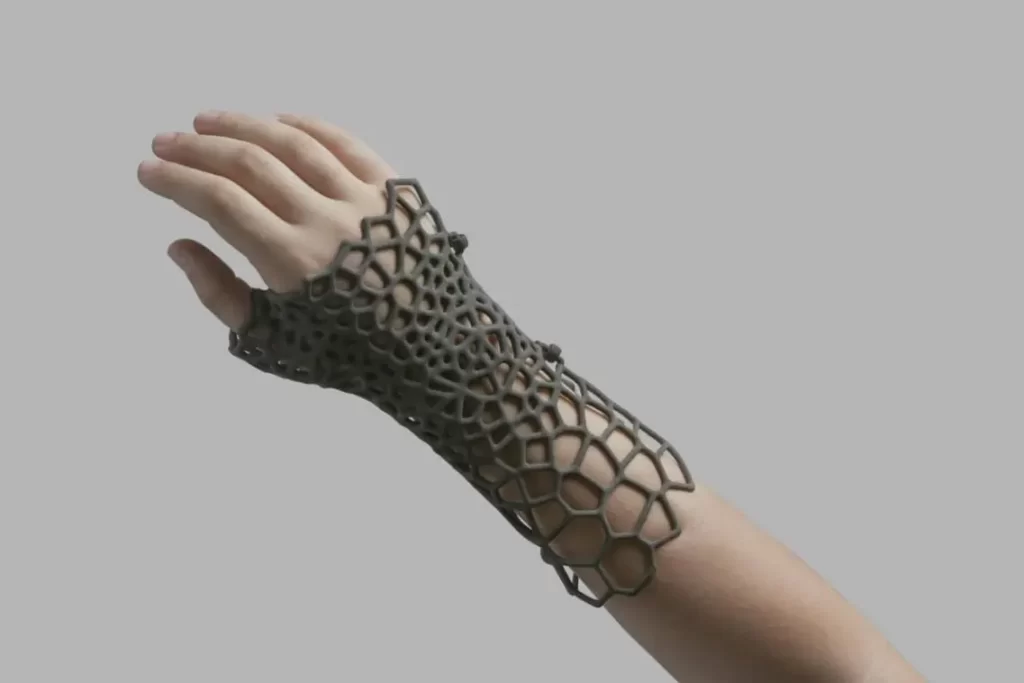
Medical
This is possible for producing customized prosthetics and implants.
Selective Laser Sintering is a very powerful and versatile 3D printing technology that offers a myriad of advantages to both the newbies and professionals alike. If you know how it works fully, you will be able to weigh in on its pros and cons and decide whether it is the right choice for your projects.
How to Choose the Right SLS 3D Printer: A Beginner’s Guide
The process of choosing an SLS 3D printer can be a bit overwhelming for many when entering into the world of Selective Laser Sintering 3D printing. SLS printers are capable of making complex models; hence, they come with varying characteristics to suit different applications at different prices. The following guide will help users to know all the important considerations while choosing an SLS 3D printer, hence making an informed decision that is going to help drive their aspirations in 3D printing.
How to Choose an SLS 3D Printer
The selection of the right SLS printer will require a look at various key aspects.
The user interface and the ease of operation are very important, especially for beginners. In this respect, intuitive controls and good documentation are to be looked for.
Print Quality and Resolution: It is determined by how fine a job the laser can do and how well the printer handles fine details.
Material Compatibility: Different printers work with different materials. Make sure the printer is compatible with the kind of materials you want to print your projects on.
Safety Features: SLS printers should have enclosed build chambers and fume extraction systems—like all other requisite safety features—to make it safe for you to work with fine powders.
Software and Connectivity: Compatible software with a user-friendly interface and versatile connectivity options can really help elevate your printing experience.
Support and Warranty: Good customer support and comprehensive warranty insurance on your investment are there to help you learn.
Budget and Running Costs: Consider not just the actual cost of the printer itself but the long-term running costs, which include materials and maintenance.
| Feature | Importance for Beginners | Considerations |
| Ease of Use | High | User-friendly interface, easy setup |
| Build Volume and Size | Medium | Fits workspace, meets project needs |
| Material Compatibility | High | Supports various materials, cost |
| Software and Connectivity | Medium | Compatible software, connectivity options |
| Budget | High | Initial cost, operating expenses |
| Support and Community | High | Customer support, online resources |
Choose the right SLS 3D printer, and you are halfway through the fruitful experience of 3D printing. Key features, a budget breakdown, and support and community resources will go a long way toward picking a printer that will not only serve your needs but also enable your creativity and productivity.
Top 5 SLS 3D Printers for Beginners in 2024: Full Review
Getting started with SLS 3D printing can be both very exciting and overwhelming. With all the available options, finding a printer that will provide you with the right balance between quality, ease of use, and affordability becomes very important. In this article, we will go through the top five SLS 3D printers for beginners in the year 2024 to get you started with your buying decision.
1. Fuse 1 by Formlabs
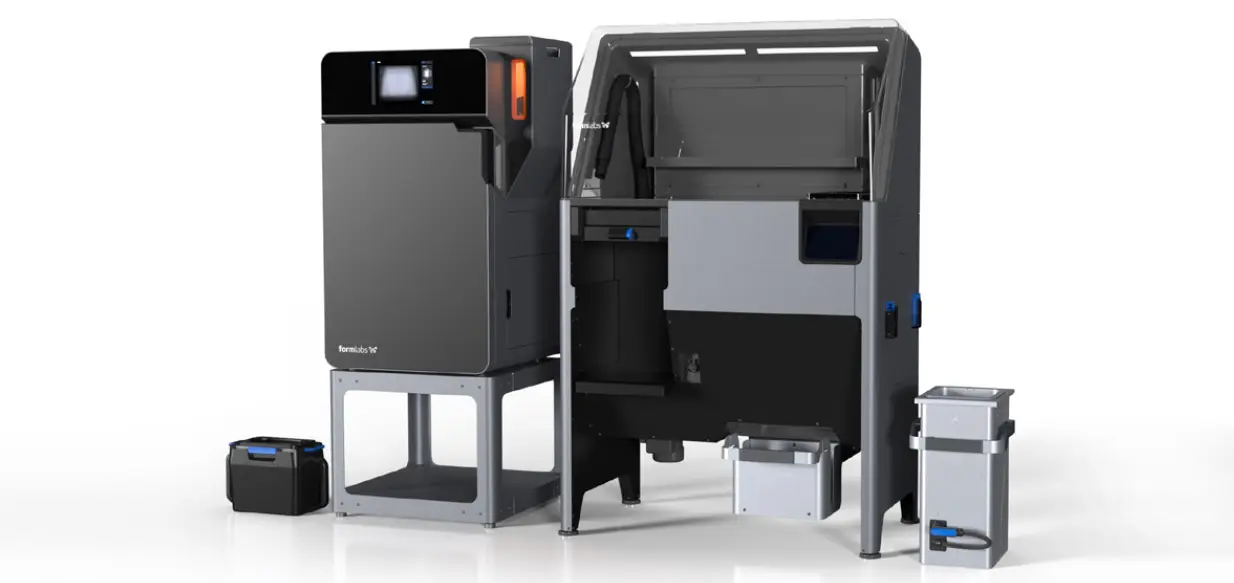
- Price: Approximately $9,999
- Build Volume: 165 x 165 x 300 mm
- Materials: Nylon, Flexible materials
Pros:
- Compact design suitable for small spaces.
- User-friendly interface with a touchscreen display.
- High-quality prints with good detail.
Cons:
- Higher price point compared to other beginner options.
- Limited material compatibility compared to larger industrial printers.
The Fuse 1 is a great entry point for beginners looking to explore SLS printing without overwhelming complexity. Its small footprint and ease of use make it suitable for home or small workshop environments.
2. Lisa Pro by Sinterit
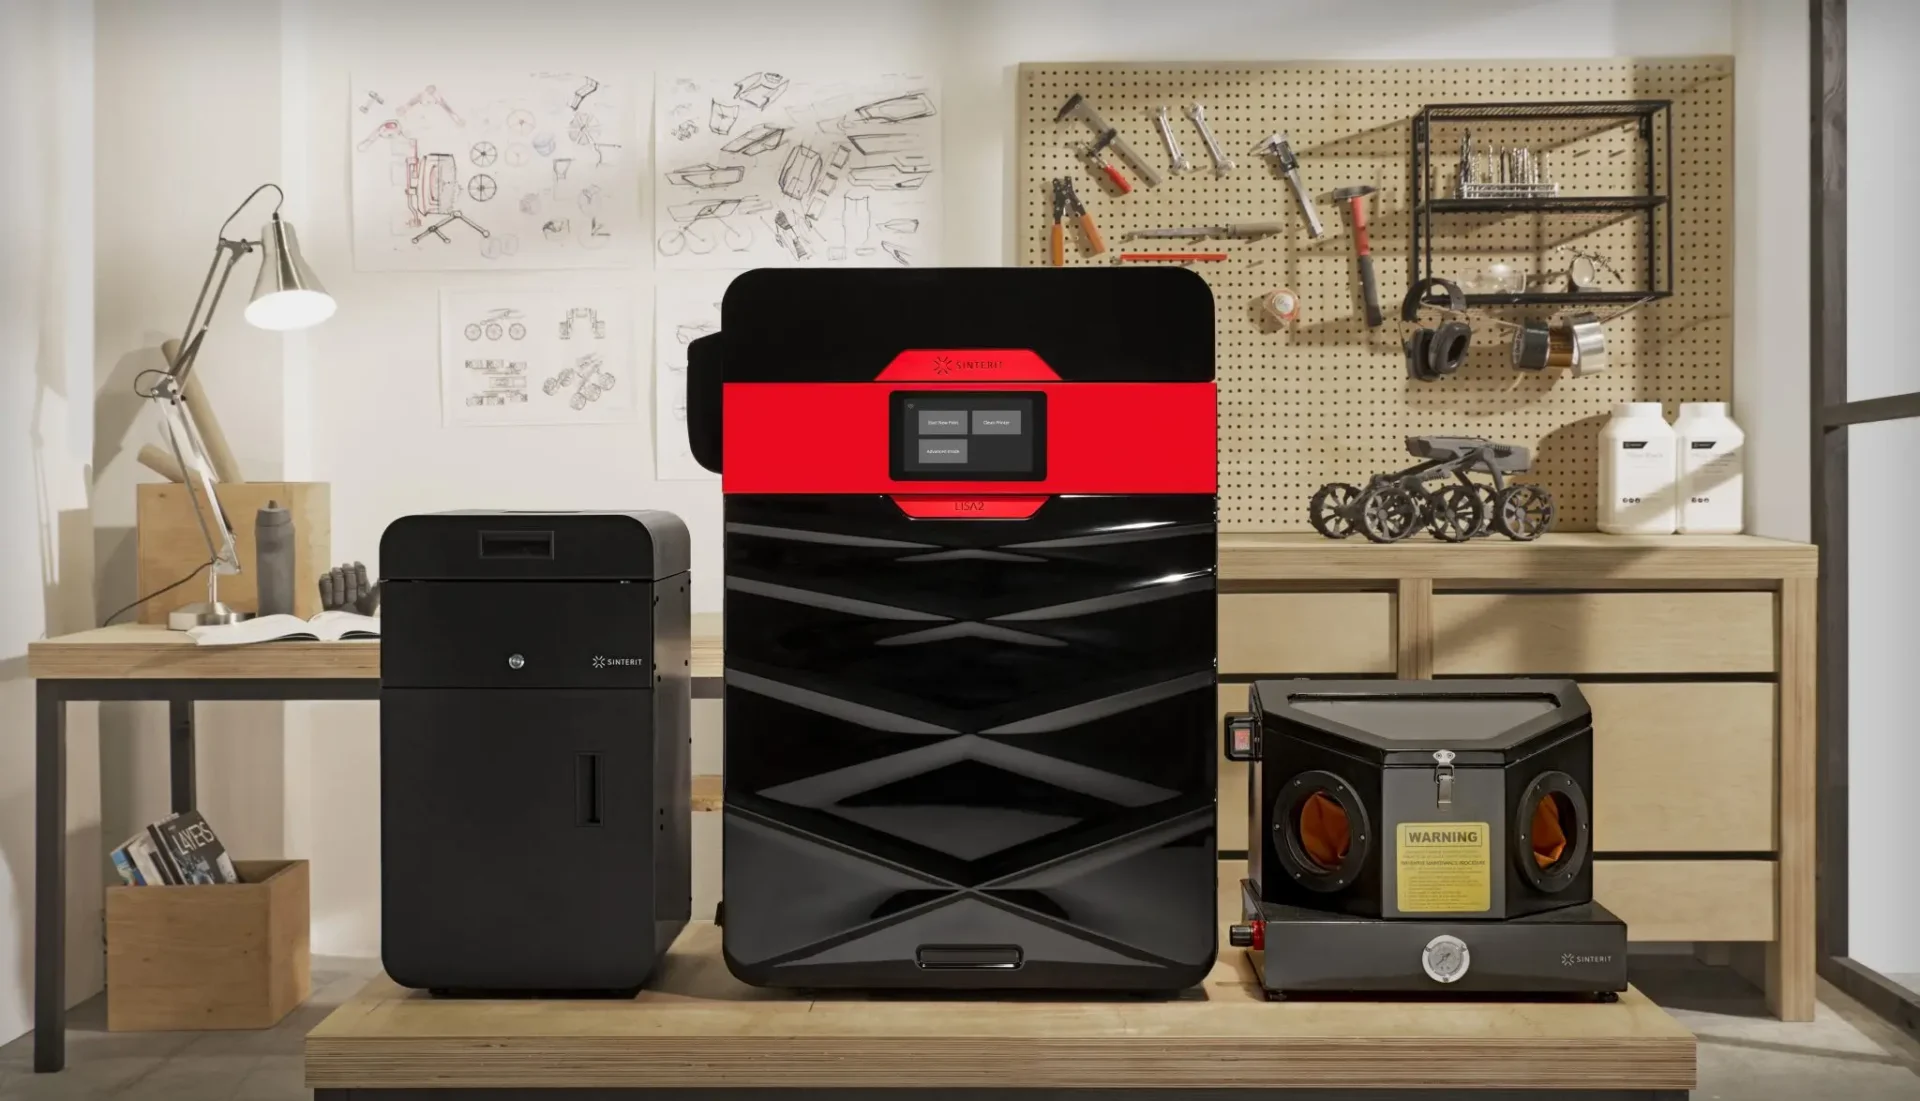
- Price: Around $9,900
- Build Volume: 110 x 160 x 230 mm
- Materials: PA11, PA12, and more flexible materials
Pros:
- Open material system allows for a variety of materials.
- Good for prototyping and small batch production.
- Offers a range of customizable print settings.
Cons:
- Smaller build volume may limit larger projects.
- Requires some technical knowledge to optimize settings.
The Lisa Pro offers versatility and is perfect for those who want to experiment with different materials. It’s a solid choice for beginners who are willing to learn the ropes of SLS printing.
3. QLS 260 by Nexa3D
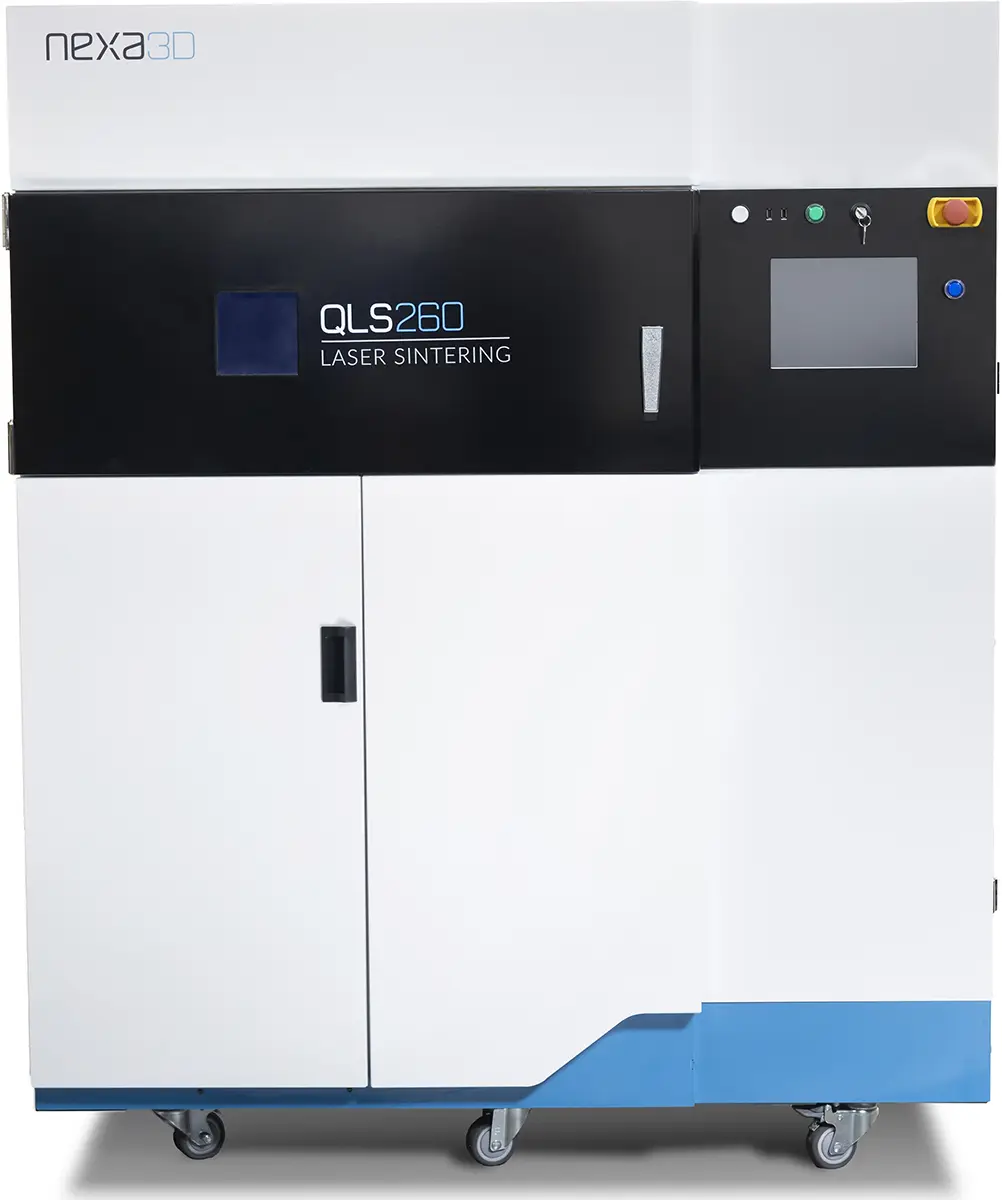
- Price: Approximately $7,999
- Build Volume: 230 x 230 x 250 mm
- Materials: Polyamides, PP, TPU, and metal powders
Pros:
- Fast print speeds and low operating costs.
- Compatible with a wide range of materials.
- Great for functional prototypes.
Cons:
- Still on the pricier side for hobbyists.
- More suited for those with some experience in 3D printing.
The QLS 260 is a powerful machine that balances speed and material flexibility, making it a great choice for beginners who are serious about SLS printing.
4. Sinterit Lisa by Sinterit
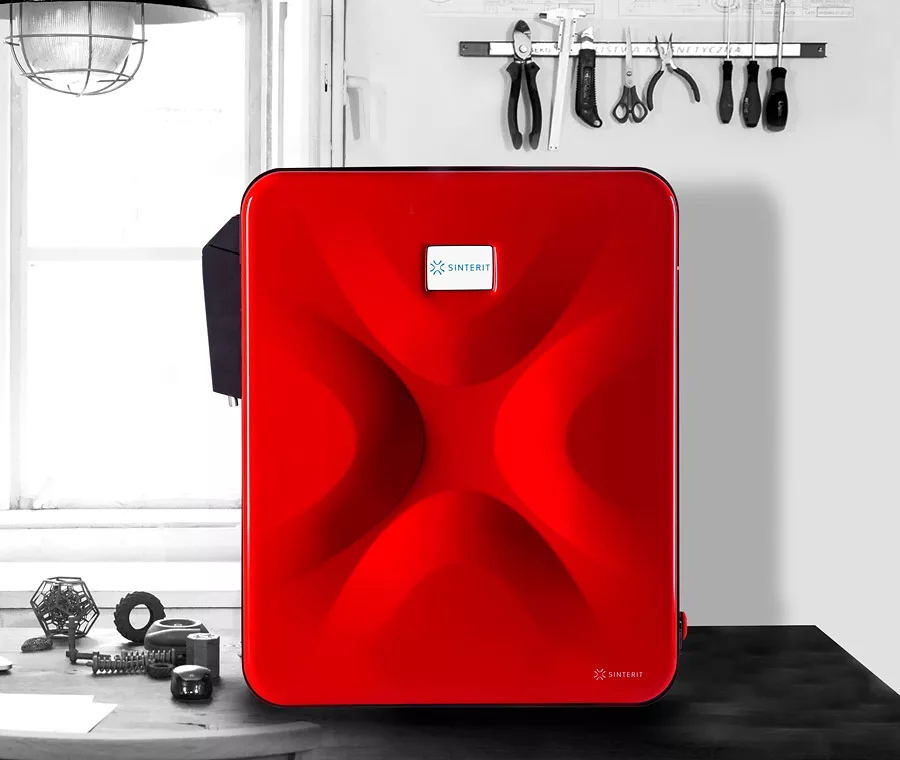
- Price: Approximately $4,900
- Build Volume: 110 x 160 x 230 mm
- Materials: PA12, TPU, and more
Pros:
- Affordable entry into SLS technology.
- Compact and easy to use.
- Good print quality for small parts.
Cons:
- Limited build volume.
- Requires careful handling of materials.
The Sinterit Lisa is a budget-friendly option that allows beginners to explore SLS printing without a massive investment. It’s perfect for small-scale projects and prototyping.
5.Zongheng3D SLS 2030
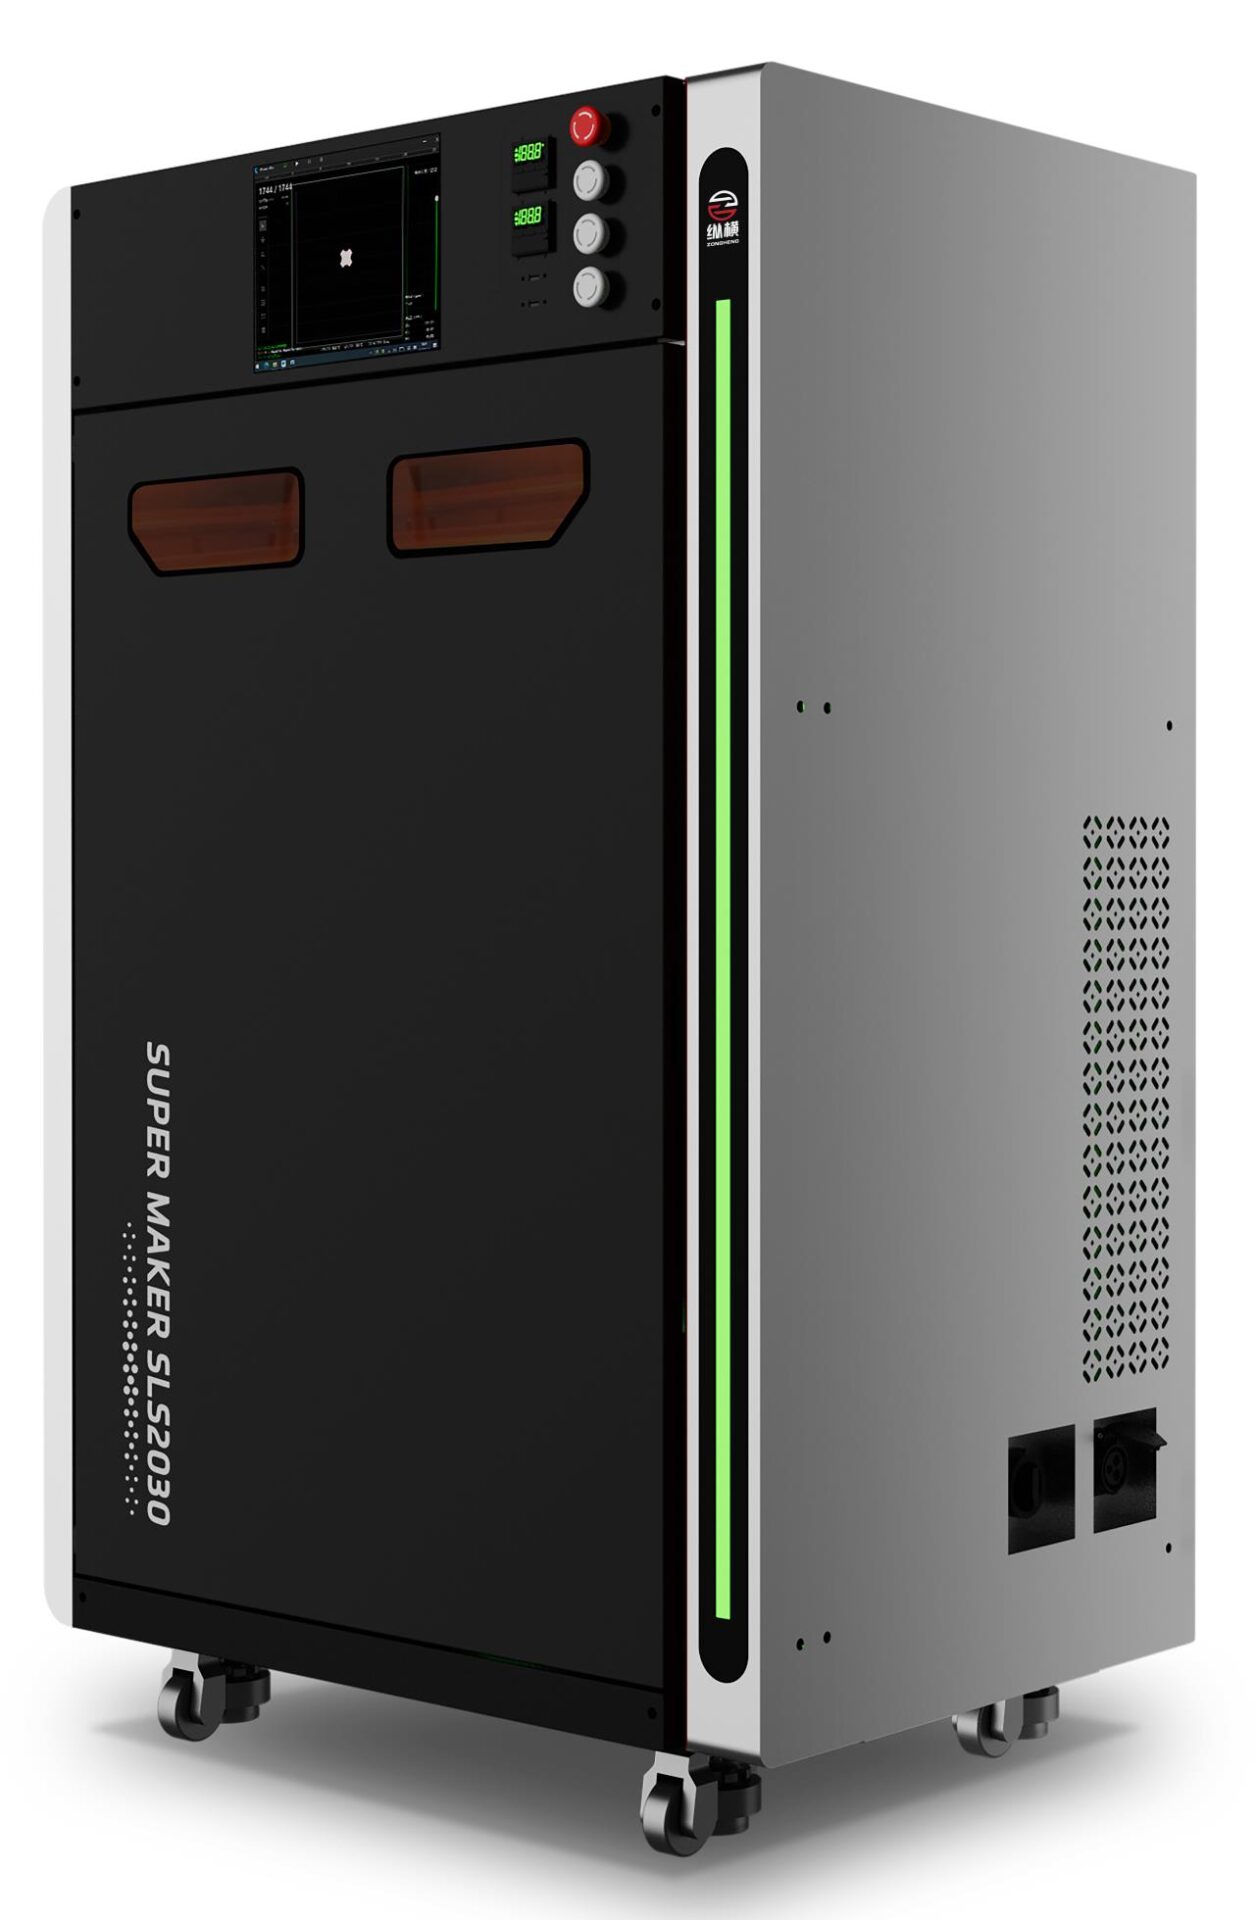
The Zongheng3D SLS 2030 is a noteworthy addition to the world of SLS 3D printing, designed to cater to both prototyping and production needs. This printer stands out for its efficiency and high precision, making it a solid choice for beginners and professionals alike.
Key Features
- Build Volume: 200 x 200 x 300 mm
- Layer Thickness: Adjustable between 0.1 to 0.3 mm
- Laser Type: 1 x 40W Fiber Laser
- Materials Supported: PA11, PA12, TPU, and Nylon with glass fiber
- Maximum Cabin Temperature: 190ºC
- Scanning Speed: 8-15 m/s
- Weight: 500 kg (without material)
- Operating Software: Developed in-house by Zongheng3D
- Connectivity: USB, RS232/RS485, Ethernet, Canopen
- Warranty: One year
Pros
- High Efficiency: Capable of full powder printing within 10 hours, significantly reducing production time.
- Precision Control: Features a high-precision digital galvo system and multi-area independent thermal field control, ensuring excellent print quality.
- User-Friendly Software: The self-developed software allows for manual and automatic control, real-time parameter modifications, and 3D visualization.
- Material Versatility: Supports a range of materials, enabling users to create diverse parts for various applications.
Cons
- Size and Weight: Being relatively large and heavy (500 kg), it may require a dedicated space and careful handling.
- Initial Cost: While specific pricing isn’t mentioned, industrial-grade SLS printers like the SLS 2030 tend to be on the higher end of the price spectrum, which might be a consideration for beginners.
SLS 2030 is positioned as an industrial-grade printer, typically priced around $29,800 or more, depending on additional features and customization options.
How to Get Started with Your First SLS 3D Printer
1. How to unbox and set up your SLS 3D printer
The very first step in the domain of SLS 3D printing will be the unboxing of your shiny, new printer. As easy as this sounds, it is quite significant to do it carefully to avoid damage to the different parts that make up the device. Most manufacturers will have a detailed guide on how to safely unbox and set up your printer, so be sure to follow these closely.
What to Look for During Unboxing:
Checking all components:
Ensure that all the parts, accessories, and manuals have come with it. It typically includes a printer itself, power cords, build chamber, laser assembly, material cartridges, tools needed for setting up the device.
Checking for damage:
Check every single component for damage during shipment. Inform the manufacturer promptly in case you find any anomaly.
Assembling the printer
This can vary from model to model, depending on how much of your SLS 3D printer has to be assembled. It could be anything from just mounting the build chamber to a fully blown alignment of the laser.
Key Assembly Steps:
Install the Build Chamber: You will attach the build chamber according to the instructions given by the manufacturer. Make sure that it is aligned correctly to avoid problems with the prints later on.
Laser Alignment: If necessary, follow the guide carefully to align the laser. Proper alignment is very important to get an accurate print, so do not rush through this step.
Software Installation Install software provided by the printer manufacturer on your computer. This software will be used to prepare your designs for printing and to control the printer.
2. Preparing Your First Print
Designing Your Model
But before you print anything, you’ll need a 3D model. You can either download a pre-made design from places like Thingiverse or MyMiniFactory, or make your own using computer-aided design software like Fusion 360 or Tinkercad.
Design Tips for Beginners:
Start with the Simple Designs: Start by selecting or designing simple models, like shapes or some simple prototype ideas, to get comfortable with the process before moving on to complex designs.
Consider Wall Thickness: Wall thickness is very important in SLS printing. One can easily find a weak point or totally fail a print if the walls are very thin, less than 1 mm. Aim for walls at least 1.5 to 2 millimeters thick for sturdier results.
Slice the model.
Once you have your 3D model, you need to “slice” it into layers that the printer understands. That is accomplished with slicing software, such as converting your design into a format that the printer can use—generally .STL or .OBJ.
Slicing Tips:
Material Settings: Choose the settings for the material in the slicer software. This, of course, depends on what material you are going to use. All of these materials need a different setting of laser power and layer height.
Layer Height: For beginners, the layer height is recommended to be between 0.1 and 0.2 mm. This allows for an ideal tradeoff between detail and print speed.
Print Orientation: Keep in mind the orientation of your model in the build chamber. Printing with flat surfaces parallel to the build plate may reduce the need for support structures and give cleaner prints.
3. Loading Material and Starting the Print
Loading the Material
SLS printers require powdered materials, which need to be loaded in the build chamber before printing. The most common material for beginners would be Nylon, PA12, since it’s an extremely resilient and forgiving material to work with.
Steps to Load Material:
Prepare the Powder: Some printers may need to pre-mix or sift the powder prior to loading it into the chamber. Directions of the manufacturer shall be followed in that regard.
Fill the Build Chamber: Gradually pour the powder into the build chamber, spreading it evenly. Be careful not to overfill the chamber since this is just going to cause an absolutely unnecessary material drain.
Calibrate the Printer: Set any needed calibrations, such as layer thickness or laser power, after the powder is loaded.
Start the Print
Now, having everything set up, you are ready to do your first print. Double-check on the settings with regard to the slicing software: make sure to choose the right material, layer height, and print orientation.
Successful First Print Tips:
Monitor the Print: Be around while the printer prints the first few layers. Observe any issues relating to powder sintering correctly or whether the laser follows a correct path.
Check for Errors: Be aware of trouble and shut off your print when you observe an issue. These can include but are not limited to the model shifted, incorrect laser power, or material not sintering correctly.
4. Post-Processing Your Prints
Removing the Print
As the print is complete, you have to remove it from the build chamber. In contrast to FDM or resin printing in which the print is clean and on its own, SLS prints are surrounded by loose powder, so the process differs from both of the other two.
Steps for Safe Print Removal:
Let it Cool: Allow the build chamber and the printed object to cool down before trying to remove it. This prevents warping and makes handling safer.
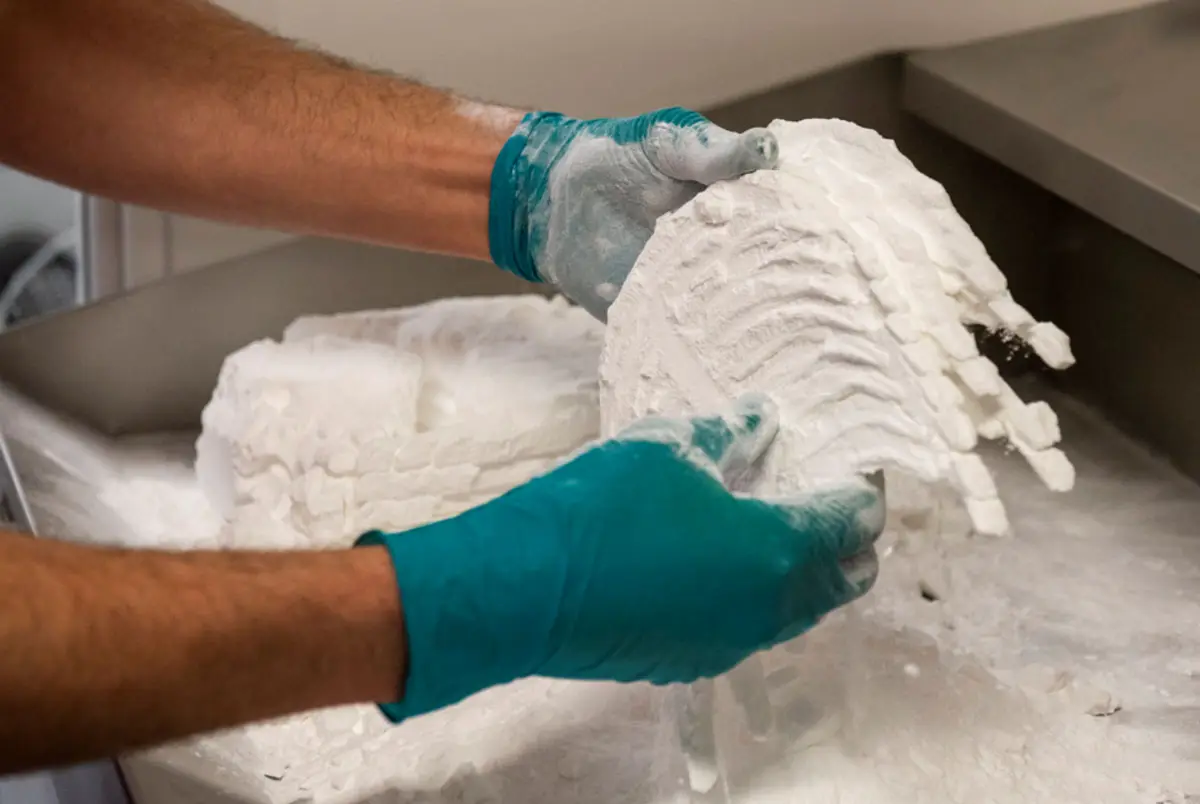
Uncovering Your Print: Carefully remove the surrounding powder to reveal your print. Use brushes or compressed air to gently clear away the excess powder.
Reclaim the Powder: Most of the SLS printers have inbuilt systems to reclaim and reutilize excess powder. Follow the suggested procedures to recycle and store unused material.
Cleaning and Finishing
Once it has been dug out, your print will probably need some cleaning and finishing to achieve an acceptable appearance and texture.
Post-Processing Tips:
Powder Removal: Blow away any residual powder from the surface of the print using compressed air, brushes, or a vacuum.
Surface Smoothening: If your print has a rough surface, techniques such as Tumbling or Media Blasting can be employed for smoothening. This is a great deal of finesse that it adds to your print.
Dyeing or Painting: SLS prints, mainly those with Nylon, can be dyed or painted into any color or look you wish to. Ensure that whatever materials one uses in this are compatible with the material the print is made of.
5. Maintenance and Troubleshooting
Routine Maintenance
Regular maintenance will keep your SLS printer great all the time. This is not only to extend the life expectancy of your printer but also to ensure that you get a constant quality of print.
Maintenance Checklist:
Clean the Laser Lens: Dust and other types of residues collect on the laser lens with continuous use, making prints less than perfect. Clean the lens gently after every few prints using a soft, lint-free cloth.
Check on the powder system: Ensure that there are no blockages or clogging of the powder delivery system.
Looking out for the build chamber: Periodically check the build chamber for any wear or damages. Replace the worn-out parts accordingly.
Keeping updating software: Always update the firmware of your printer and slicing software to the latest version. Many times, manufacturers come up with an update that brings improved performance and new features.
Troubleshooting common issues
Even with a perfect setup, there can be hiccups along the way. Knowing how to troubleshoot common problems in SLS printing is going to save you hundreds of hours of frustration and hours wasted.
Common Problems and Solutions:
Prints Not Sticking to Previous Layers:
Cause: Improper Laser Power or Material Settings.
Solution: Recalibrate the laser; Use proper material profile.
Powder Not Sintering Properly:
Cause: Humidity/Moisture in the Powder; Insufficient Laser Power.
Dry the powder before use and then slight increase in laser power.
uneven surface finish
Cause: Wrong layer height or misaligned build chamber
Solution: Check your layer height settings. Check the build chamber alignment.
Conclusion
Get started with SLS 3D printing – the most rewarding way to create high quality, rugged parts right from your desktop. Following the setup, printing, and post-processing steps in this guide will get you well on your way to mastering your new SLS 3D printer.
Again, the most critical factors in SLS printing are patience and a need for detail. Take your time at each step, and don’t be afraid to experiment with settings and different materials as you get more comfortable with the process. Happy printing!

